Simplify API Testing with PhpStorm HTTP Requests
A Convenient Alternative to Postman and Insomnia
API testing is a critical aspect of modern software development, ensuring that the services we build and integrate work seamlessly. While developers often rely on dedicated tools like Postman and Insomnia, what many aren't aware of is that JetBrains' IDEs, including PhpStorm, offer powerful built-in features for handling HTTP requests.
In this guide, I'll explore how PhpStorm's HTTP Client streamlines API testing and improves my development workflow right within the IDE. I'll delve into organizing requests, utilizing variables, and even importing and exporting requests. By the end, you'll have a solid grasp of how to leverage PhpStorm's capabilities for effective API testing.
Getting Started
To keep things organized, I prefer to create a folder in my project called ".http". This allows me to store all my HTTP requests in a single place. To ensure that these requests don't get accidentally committed, I will add the ".http" folder to my global .gitignore file. Read my article about using a global gitignore for more information. However, if I ever need to share these requests with my team, I can simply store them in a folder that is committed to the repository.
For this article, I will use the JSONPlaceholder - Free Fake REST API website, which provides various API endpoints that can be used for testing purposes.
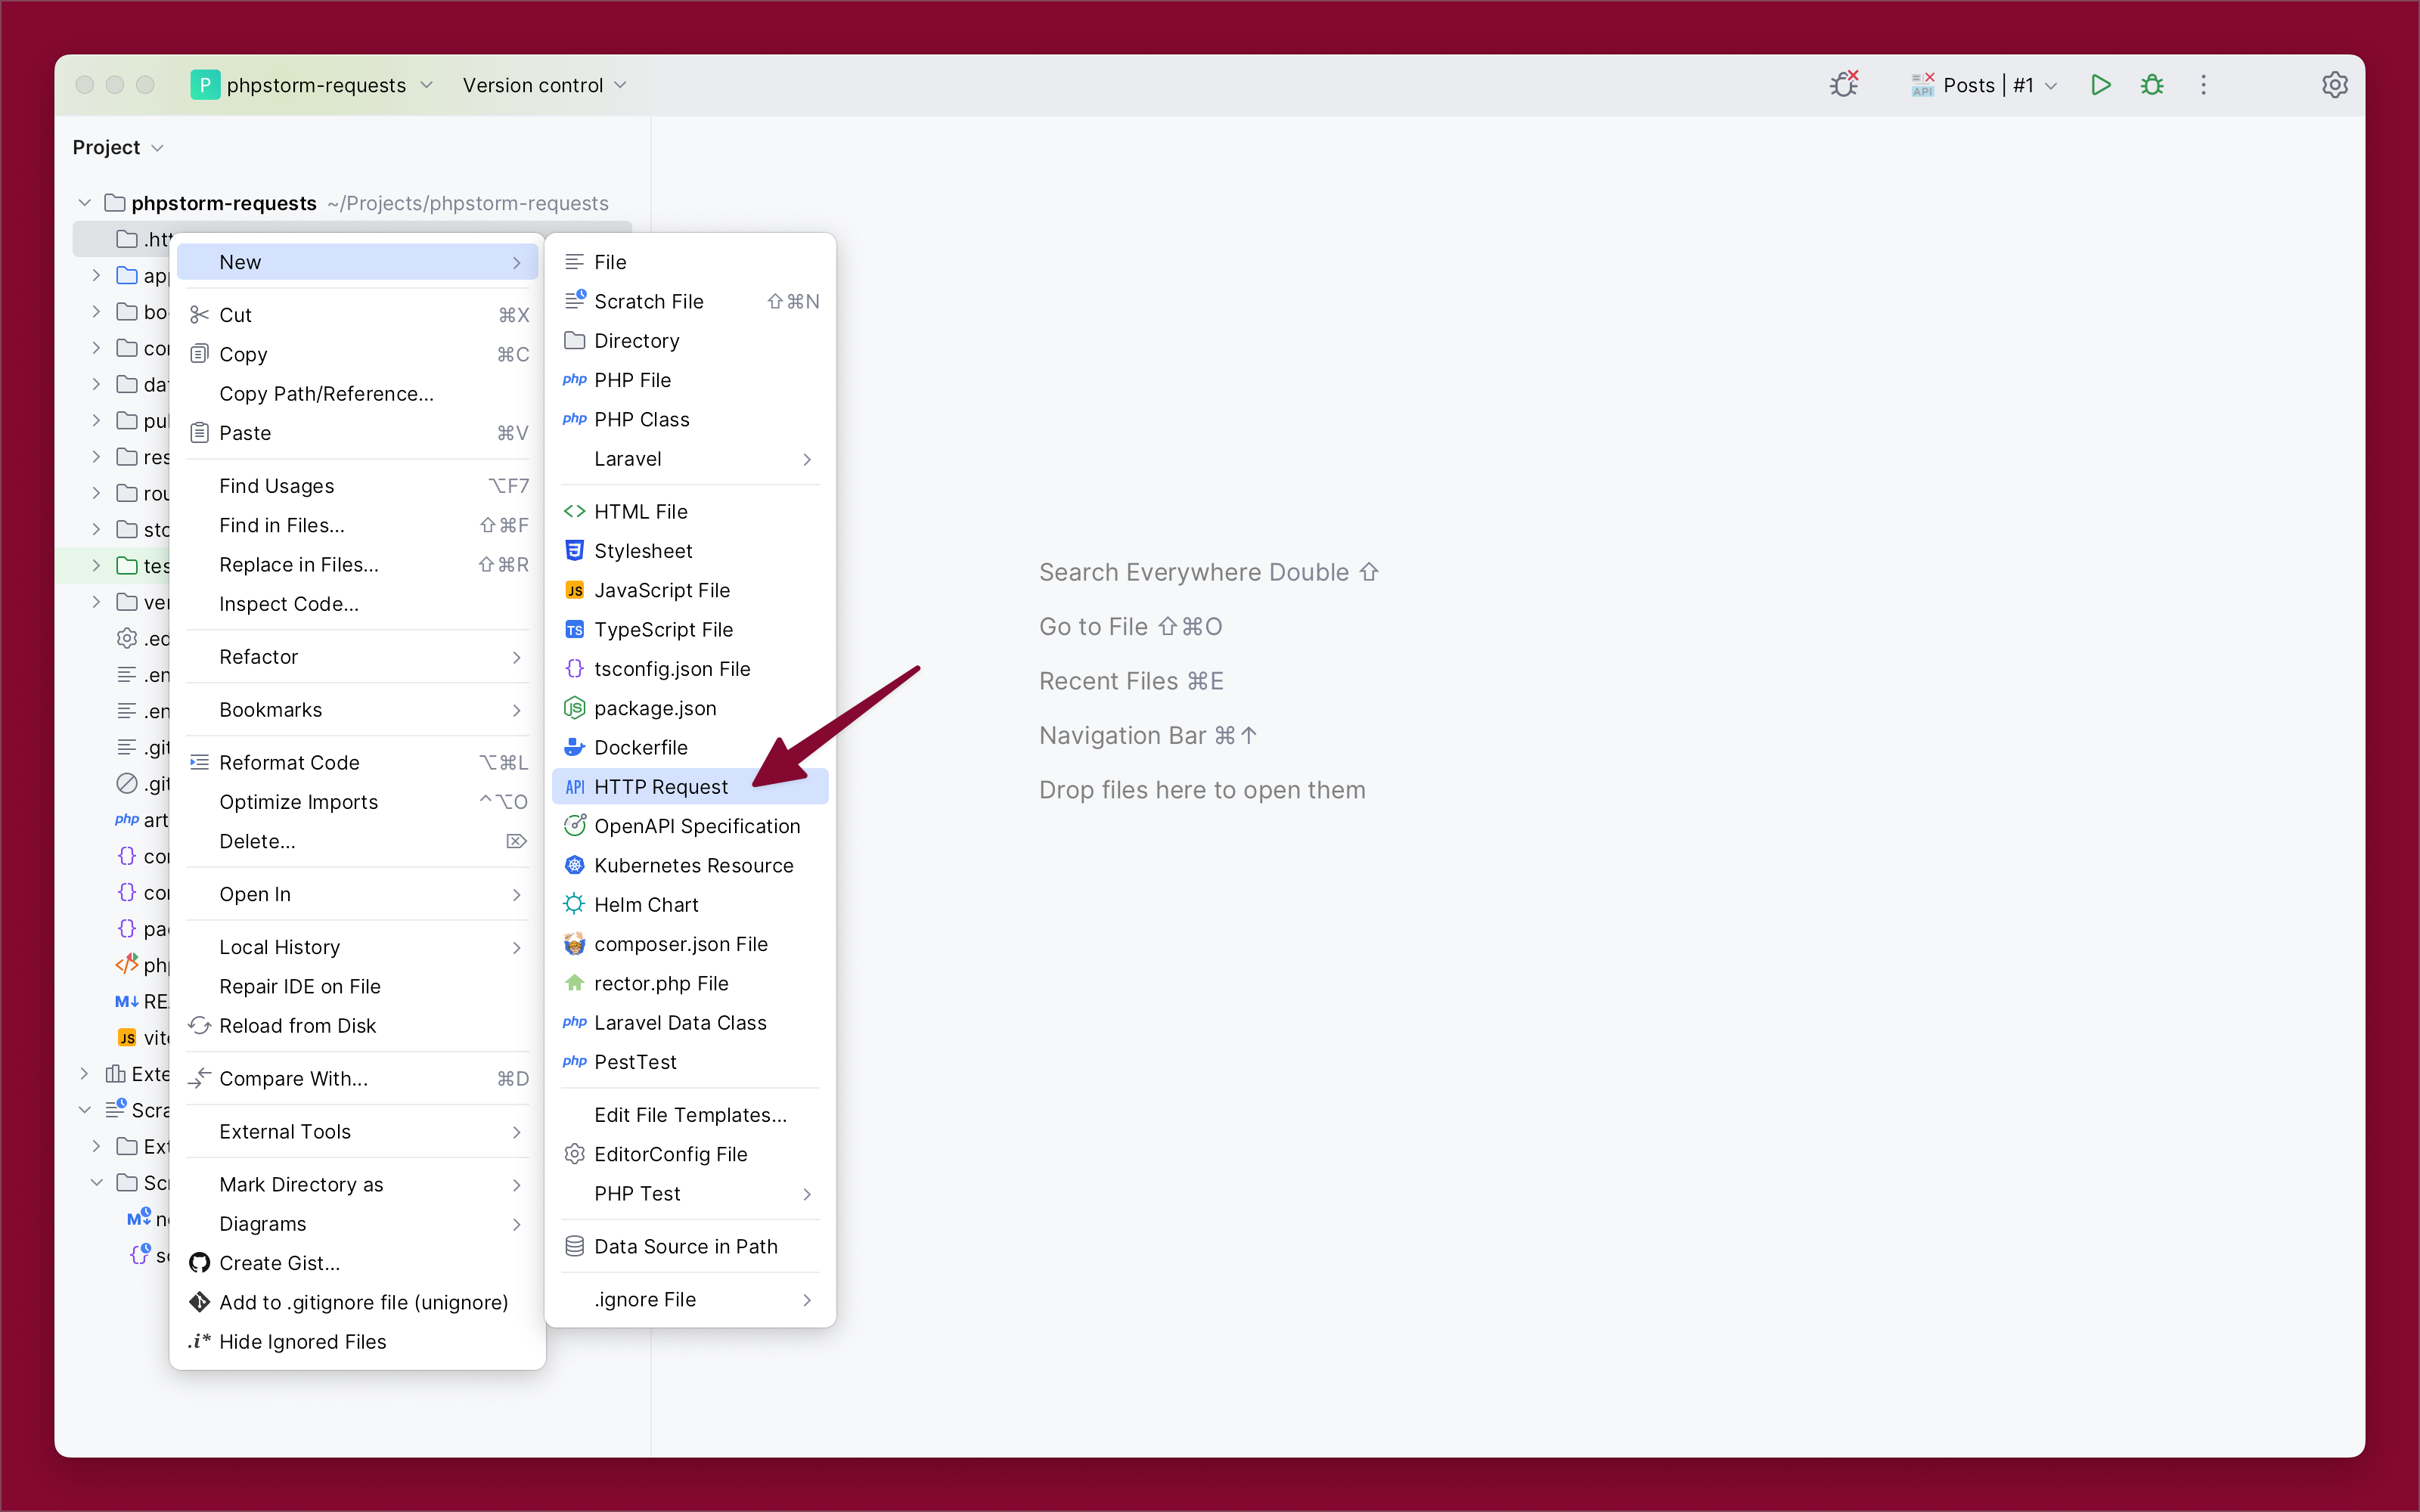
Once I have the ".http" folder in my project, I can easily create a new request file called "Posts.http". This allows me to organize all my Post-related HTTP requests in one place.
Posts Requests
Get Posts List
In my "Posts.http" file, I create a request to list all posts. I can either type this request manually or use the UI to add it. With the UI, I will click on the plus + icon and select the request type.
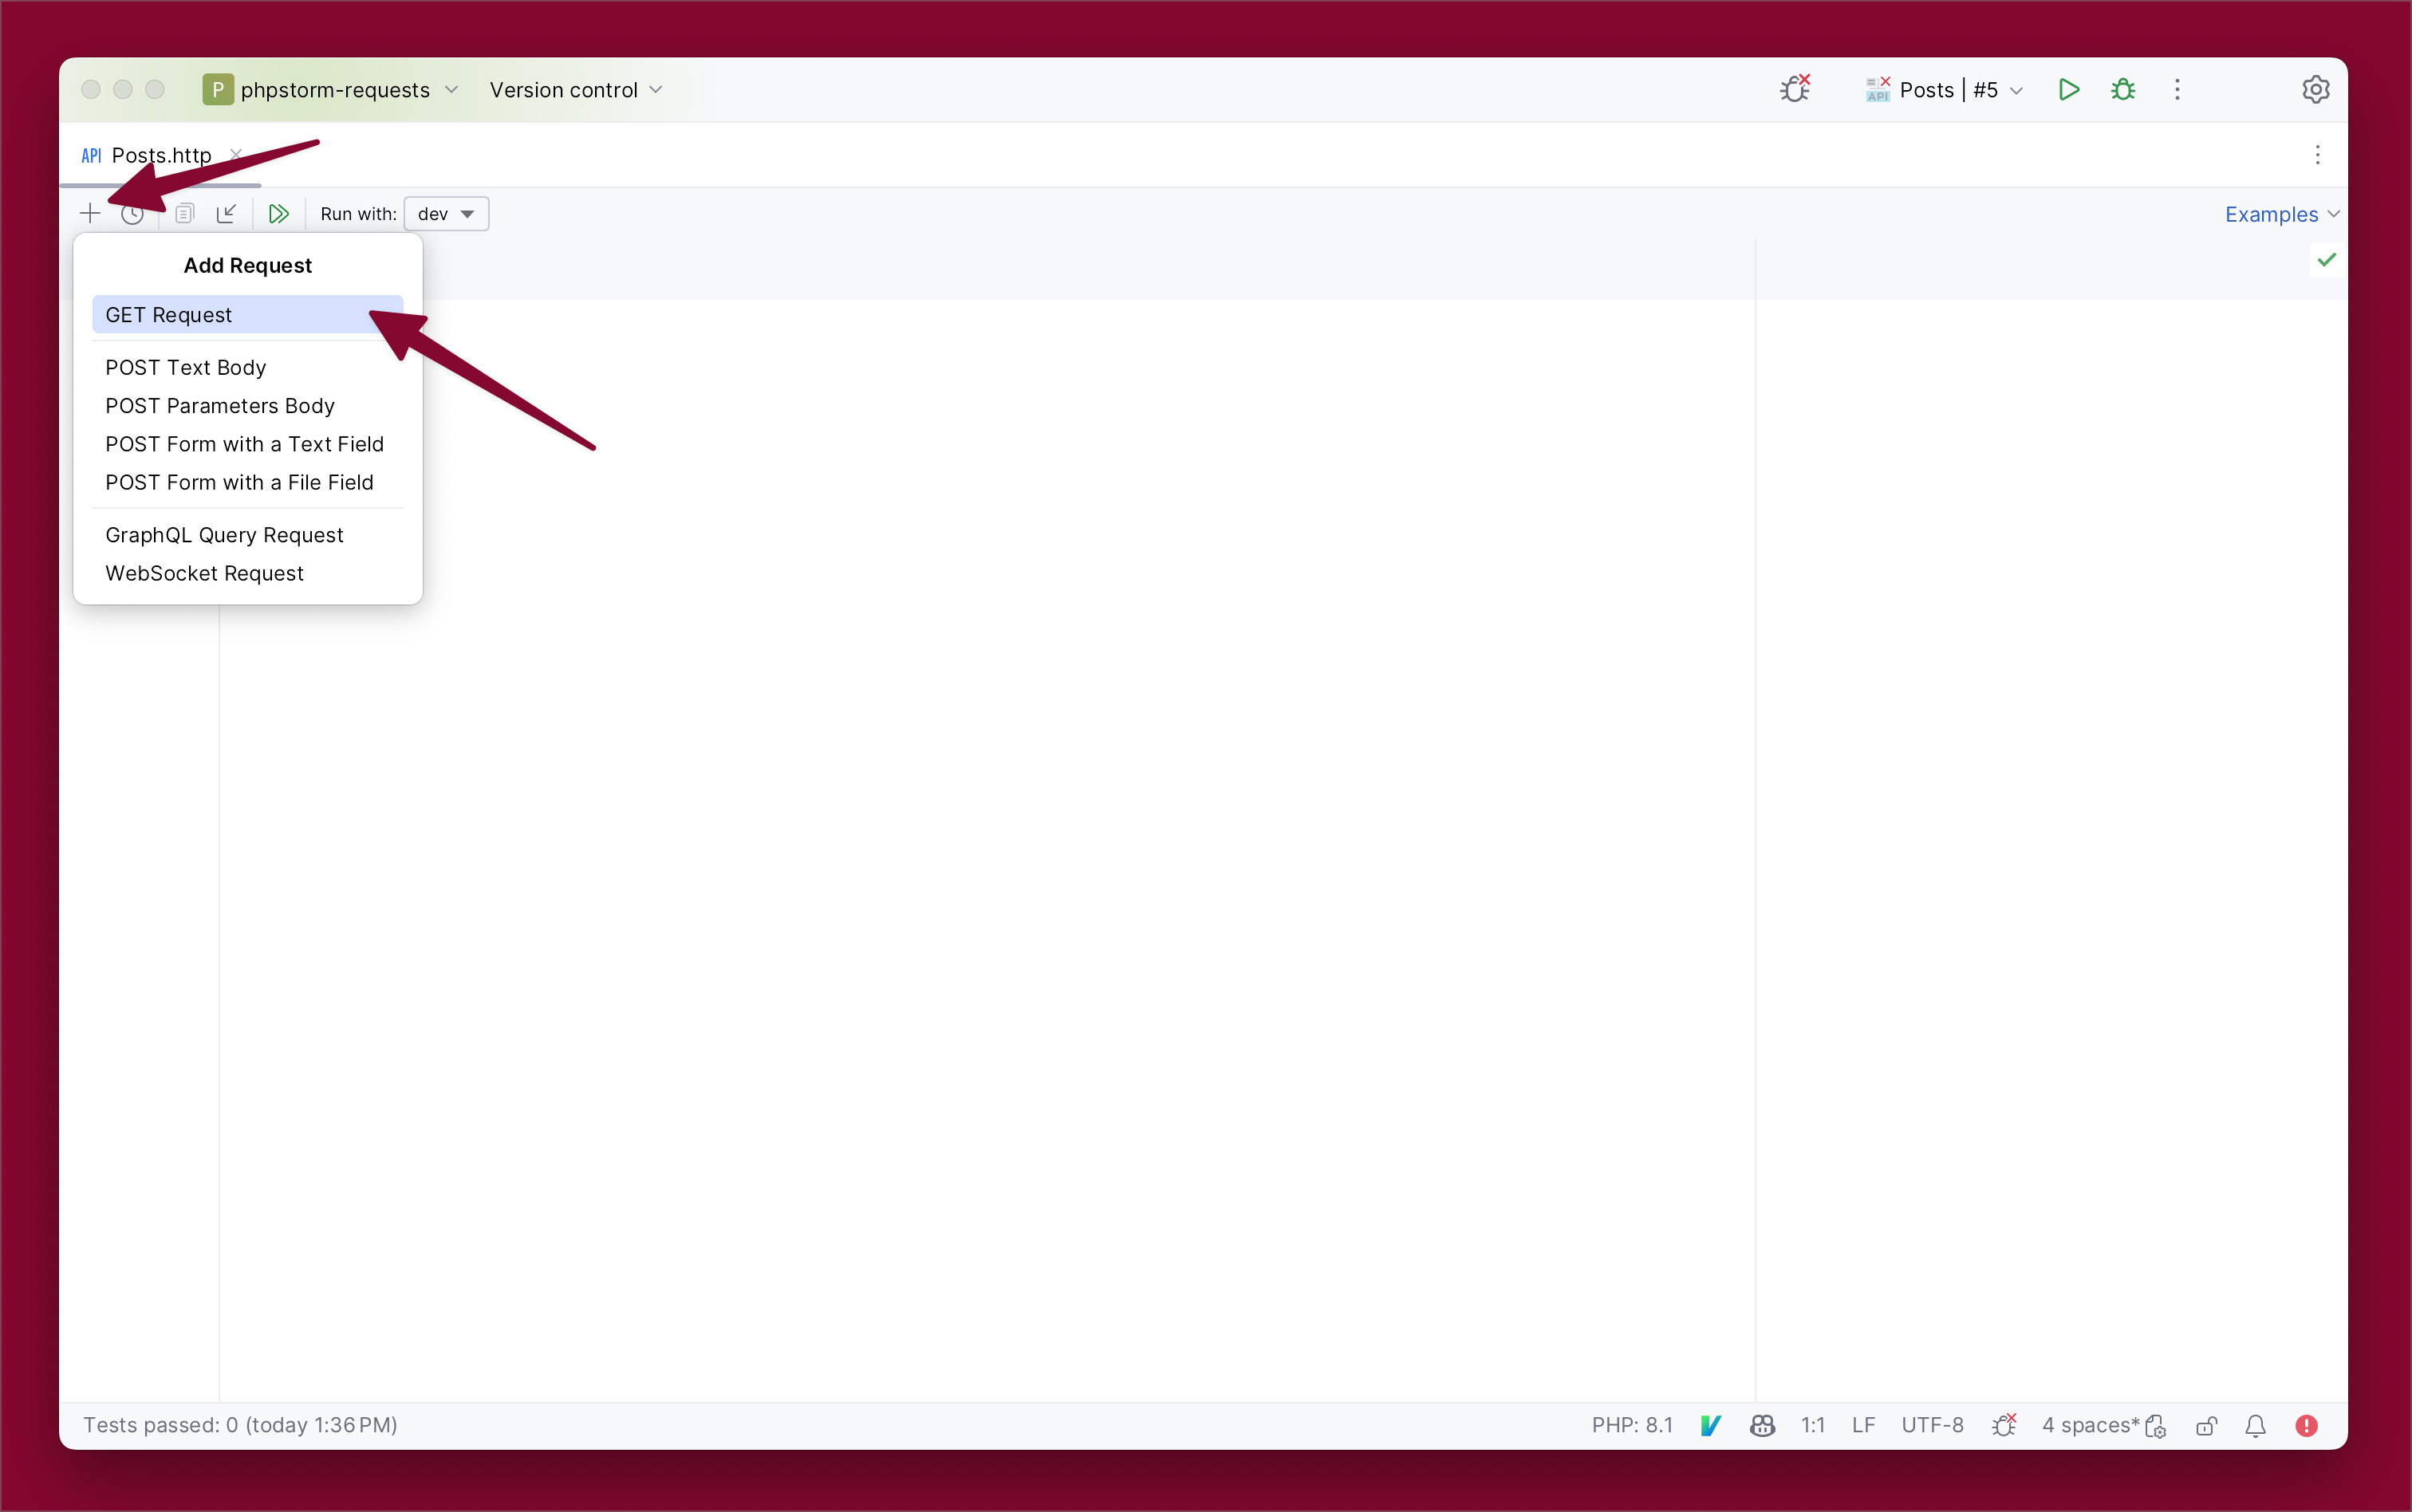
For listing posts, I will create a GET request. This will add the following content to the file:
GET http://localhost:80/api/item?id=99
Accept: application/json

###
I will update it to use the JSONPlaceholder - Free Fake REST API. I will remove the Accept header for now.
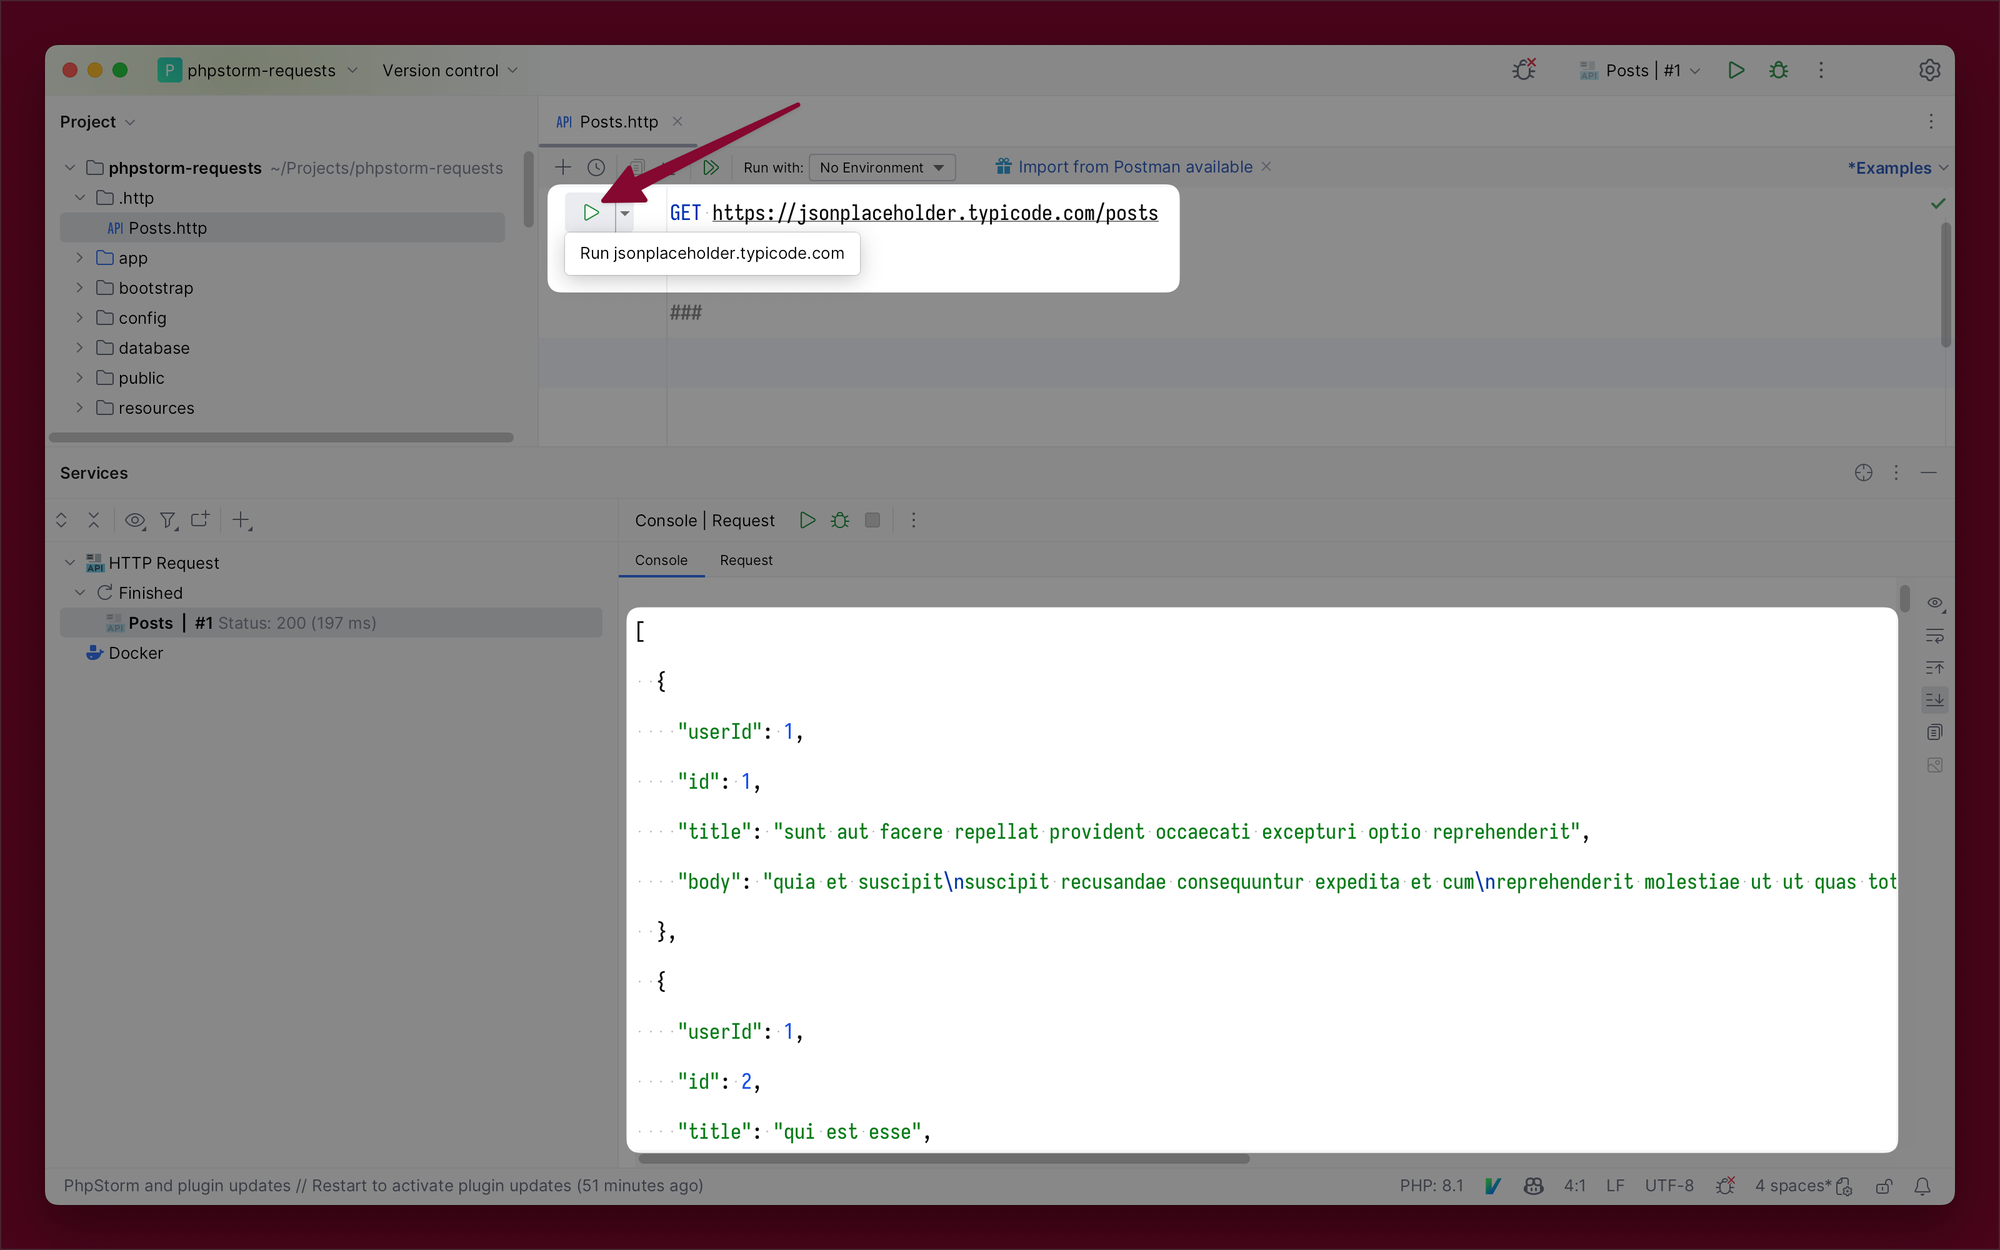
GET https://jsonplaceholder.typicode.com/posts

###
Once the request is ready, it's time to run it. I click the "Play" button, and the results appear in the console below.
Get Post
To get a specific post, I can add a new request to the file. I can even add comments to describe the requests, either using # or //.
# List Posts
GET https://jsonplaceholder.typicode.com/posts

###

# Get Post
GET https://jsonplaceholder.typicode.com/posts/1
Also, I make sure to separate the requests with ### which is required by the .http syntax.
Create Post
To create a new post, I’ll add a POST request and a JSON body.
# List Posts
GET https://jsonplaceholder.typicode.com/posts

###

# Get Post
GET https://jsonplaceholder.typicode.com/posts/1

###

# Create Post
POST https://jsonplaceholder.typicode.com/posts
Content-Type: application/json

{
  "title": "Post title",
  "body": "Post body",
  "userId": 1
}
It can also be helpful to add the Content-Type header to specify that JSON is being passed to the server.
Update Post
Updating a post is similar to creating a post, but I’ll use a PUT request.
# List Posts
GET https://jsonplaceholder.typicode.com/posts

###

# Get Post
GET https://jsonplaceholder.typicode.com/posts/1

###

# Create Post
POST https://jsonplaceholder.typicode.com/posts
Content-Type: application/json

{
  "title": "Post title",
  "body": "Post body",
  "userId": 1
}

###

# Update Post
PUT https://jsonplaceholder.typicode.com/posts/1
Content-Type: application/json

{
  "title": "New title"
}
Delete Post
Finally, I can delete a post using a DELETE request.
# List Posts
GET https://jsonplaceholder.typicode.com/posts

###

# Get Post
GET https://jsonplaceholder.typicode.com/posts/1

###

# Create Post
POST https://jsonplaceholder.typicode.com/posts
Content-Type: application/json

{
  "title": "Post title",
  "body": "Post body",
  "userId": 1
}

###

# Update Post
PUT https://jsonplaceholder.typicode.com/posts/1
Content-Type: application/json

{
    "title": "New title"
}

###

# Delete Post
DELETE https://jsonplaceholder.typicode.com/posts/1
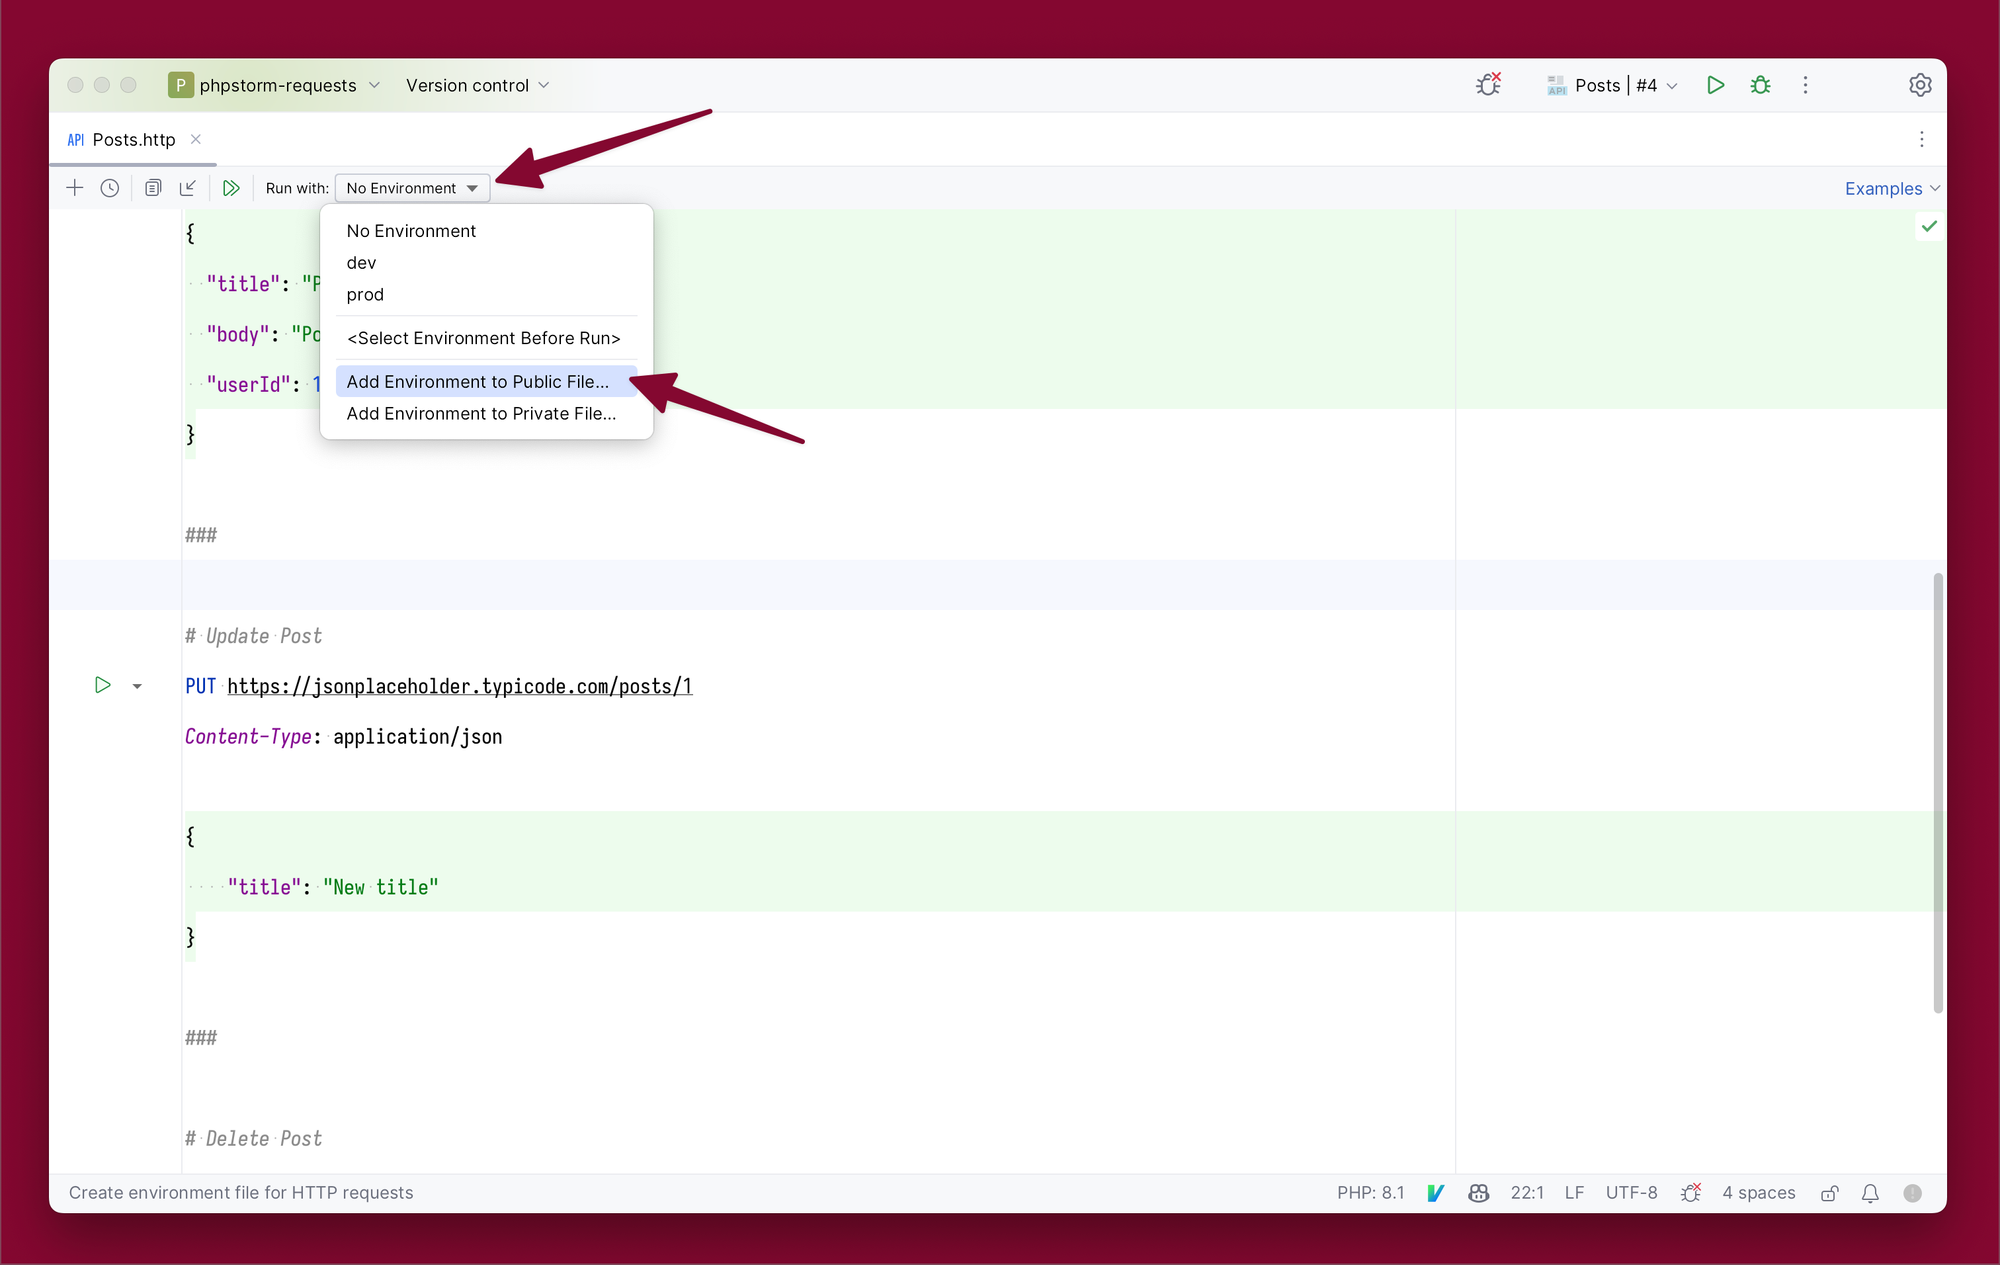
Variables
Variables are a powerful tool when it comes to managing complex API testing scenarios. PhpStorm offers various types of variables, starting with Environment Variables.
Environment Variables
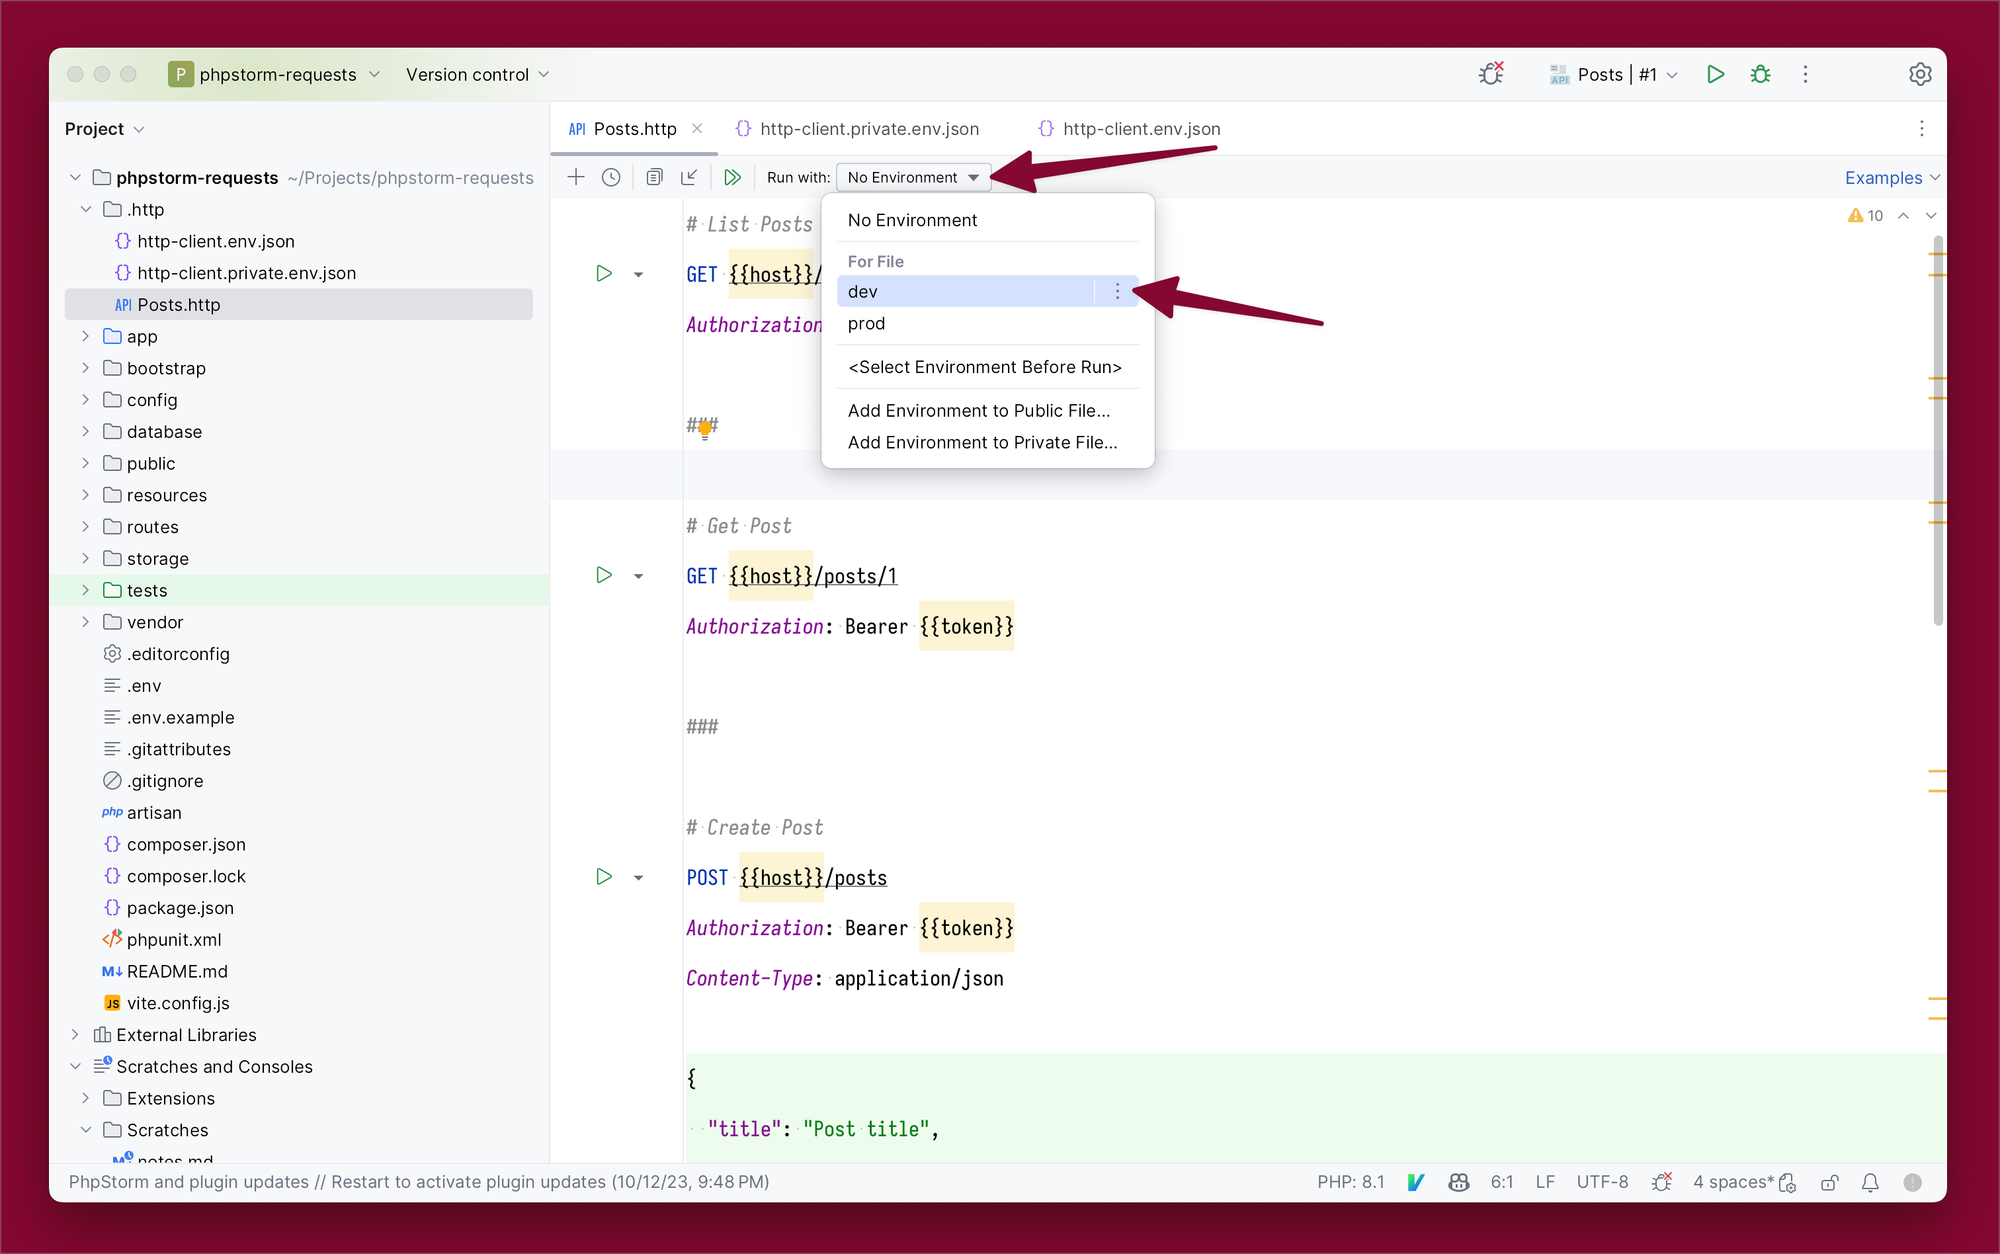
Environment variables can be used to store information such as usernames, passwords, authentication tokens, and more. They can also be used to support multiple environments. PhpStorm provides both public and private variables, which are merged before a request is made. To begin, create a public environment file.
This creates the file below:
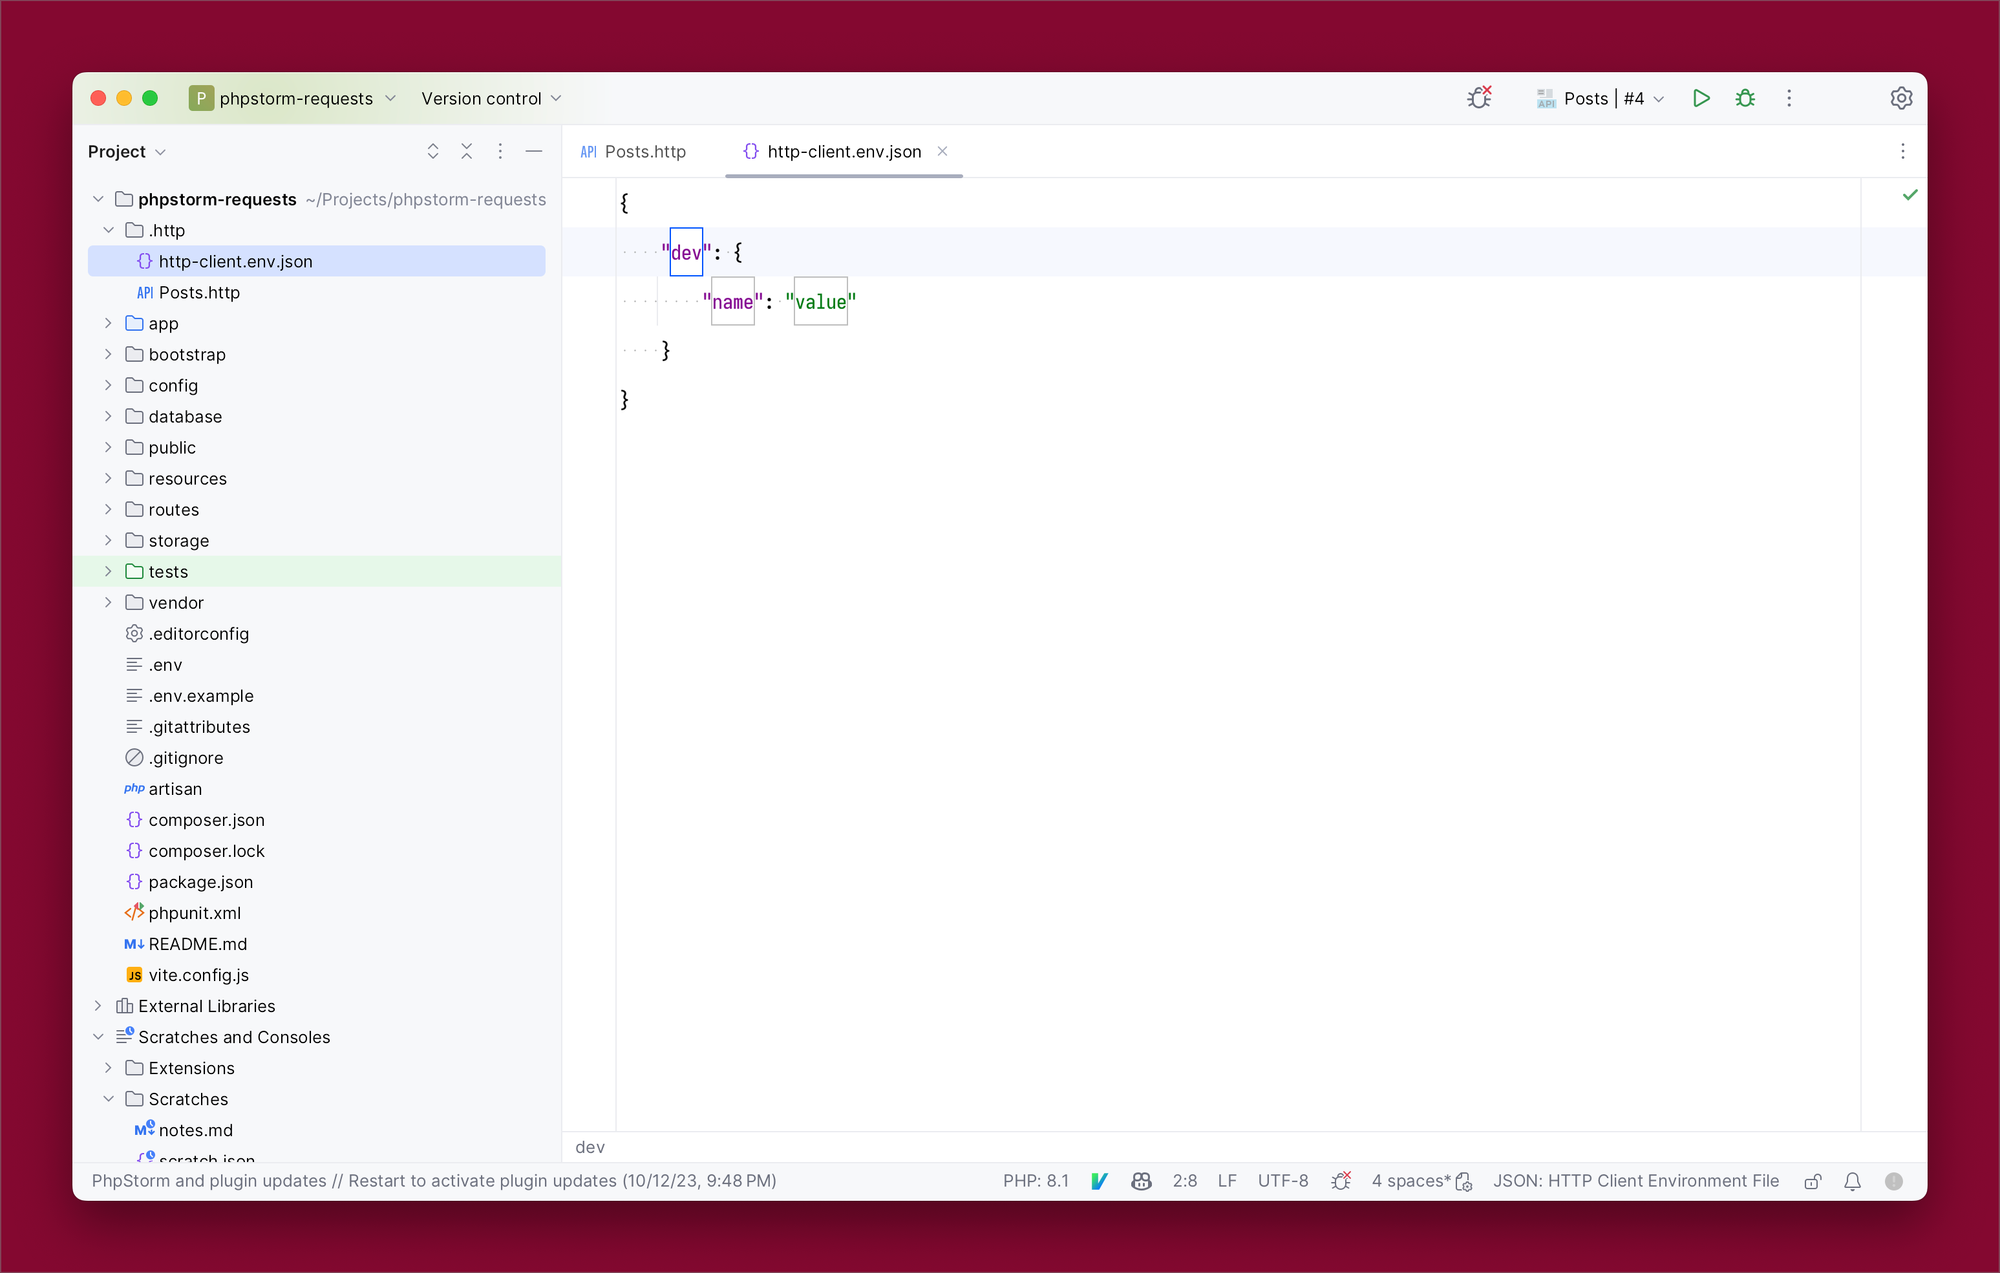
I will update the file to store a dev and production environment with a host and authentication token.
{
    "dev": {
        "host": "<https://jsonplaceholder.typicode.com>",
        "token": ""
    },
    "prod": {
        "host": "<https://jsonplaceholder.typicode.com>",
        "token": ""
    }
}
I will leave the token empty for now and add it to the private environment file. I’ll create that now.
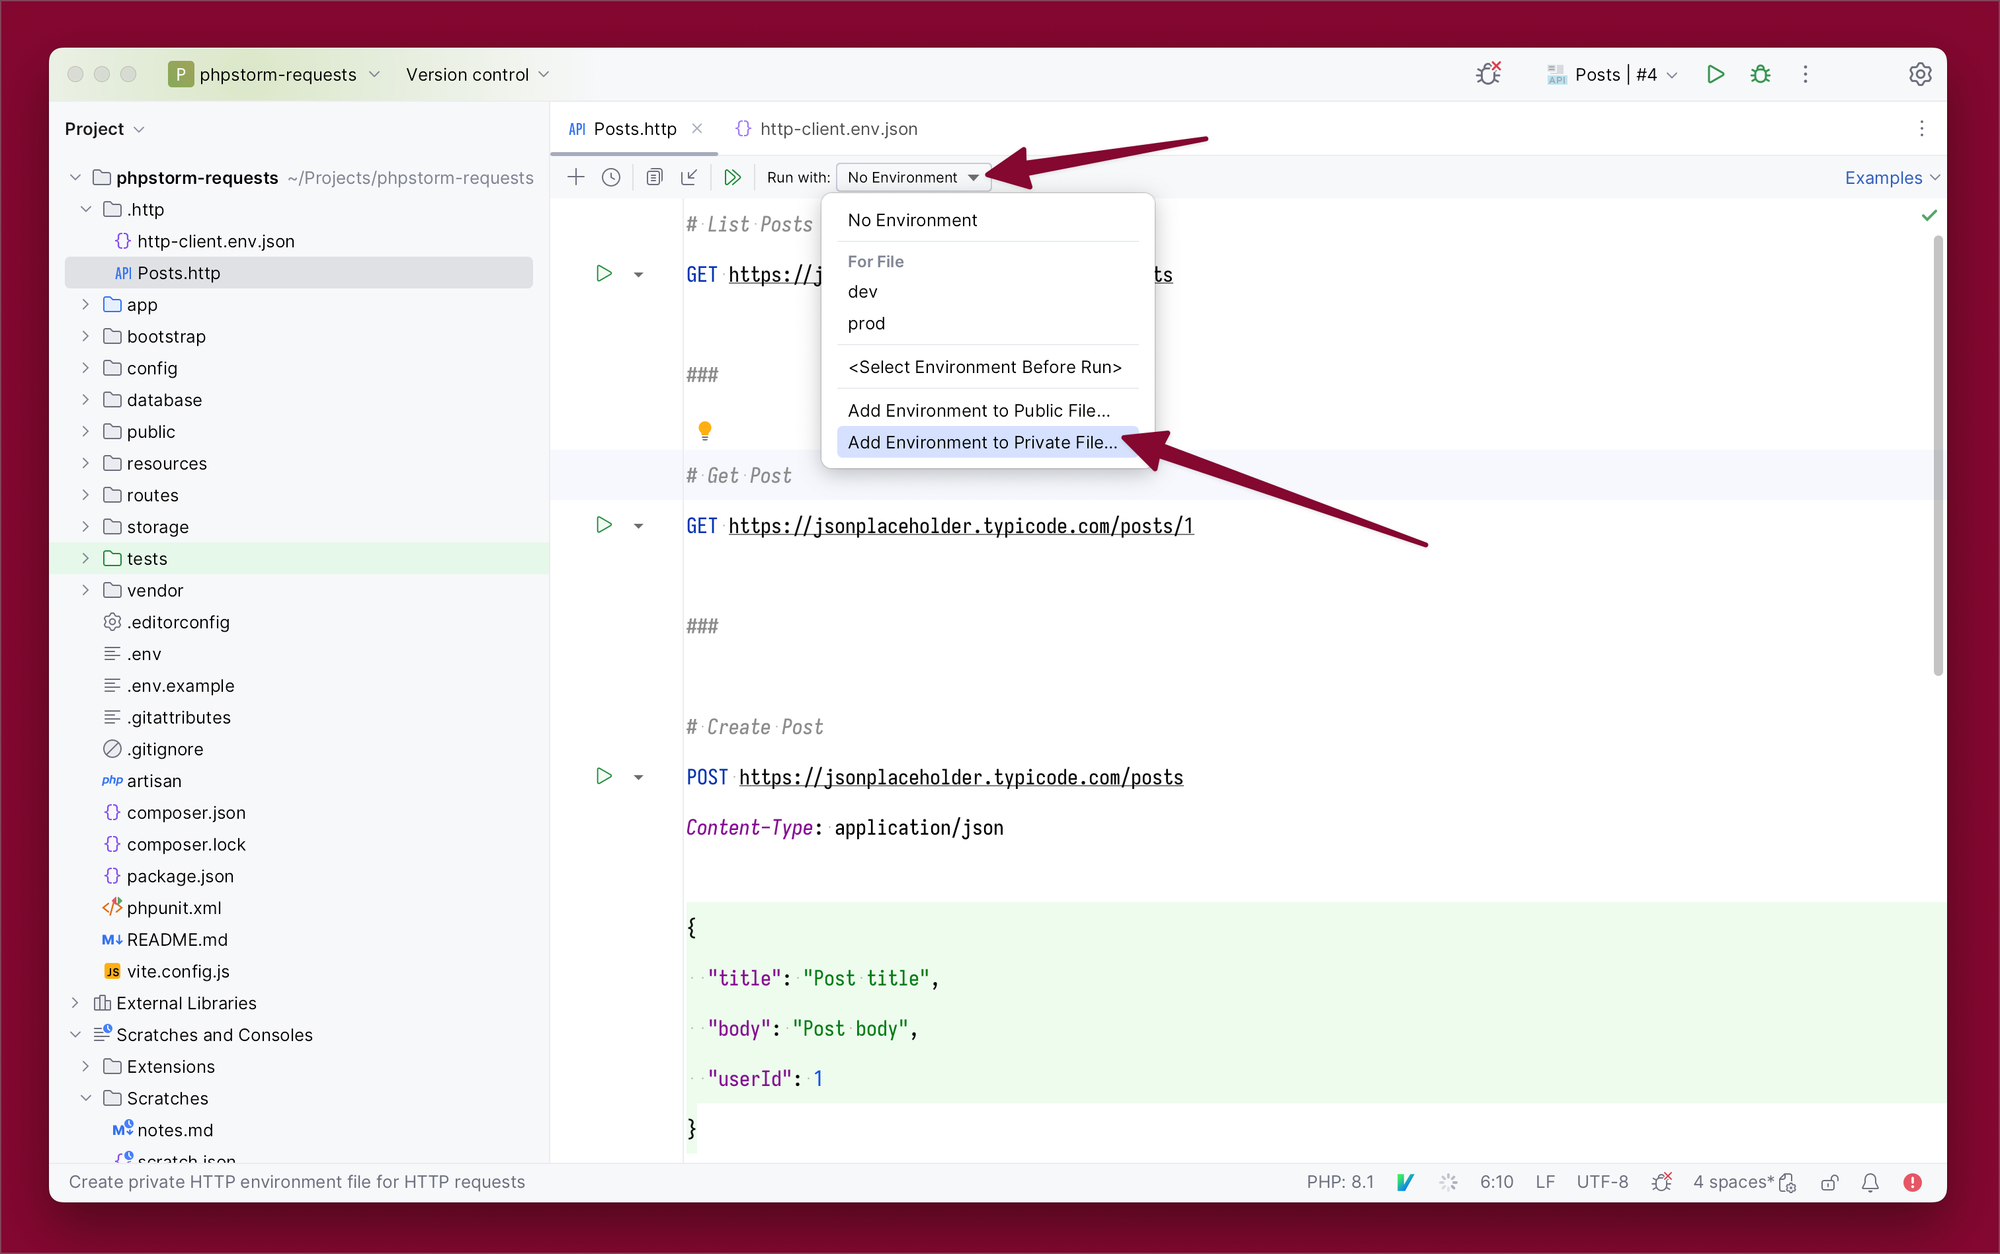
In this file, I will add the authentication tokens. It can also store usernames and passwords depending on the server authentication.
{
    "dev": {
        "token": "DEVELOPMENT_TOKEN"
    },
    "prod": {
        "token": "PRODUCTION_TOKEN"
    }
}
Now, I can add these variables to the requests.
# List Posts
GET {{host}}/posts
Authorization: Bearer {{token}}

###

# Get Post
GET {{host}}/posts/1
Authorization: Bearer {{token}}

###

# Create Post
POST {{host}}/posts
Authorization: Bearer {{token}}
Content-Type: application/json

{
  "title": "Post title",
  "body": "Post body",
  "userId": 1
}

###

# Update Post
PUT {{host}}/posts/1
Authorization: Bearer {{token}}
Content-Type: application/json

{
    "title": "New title"
}

###

# Delete Post
DELETE {{host}}/posts/1
Authorization: Bearer {{token}}
This approach saves me from having to repeat the full URL everywhere and works exceptionally well in scenarios where different environments require different hosts or tokens.
For APIs that have authorization, I can add an Authorization header with a value of Bearer {{token}}.
Before making a request, I will set the environment I want to use to replace my variables.
Per-Request Variables
Per-request variables allow me to set variables before specific requests, offering flexibility in customization. Here's how I set a per-request variable for the "Get Post" request:
# Get Post
< {%
    request.variables.set("postId", "10")
%}
GET {{host}}/posts/{{postId}}
Authorization: Bearer {{token}}
Now, when running the request, it will automatically replace postId in the URL with “10” from the postId variable. Note that request variables must be a string value.
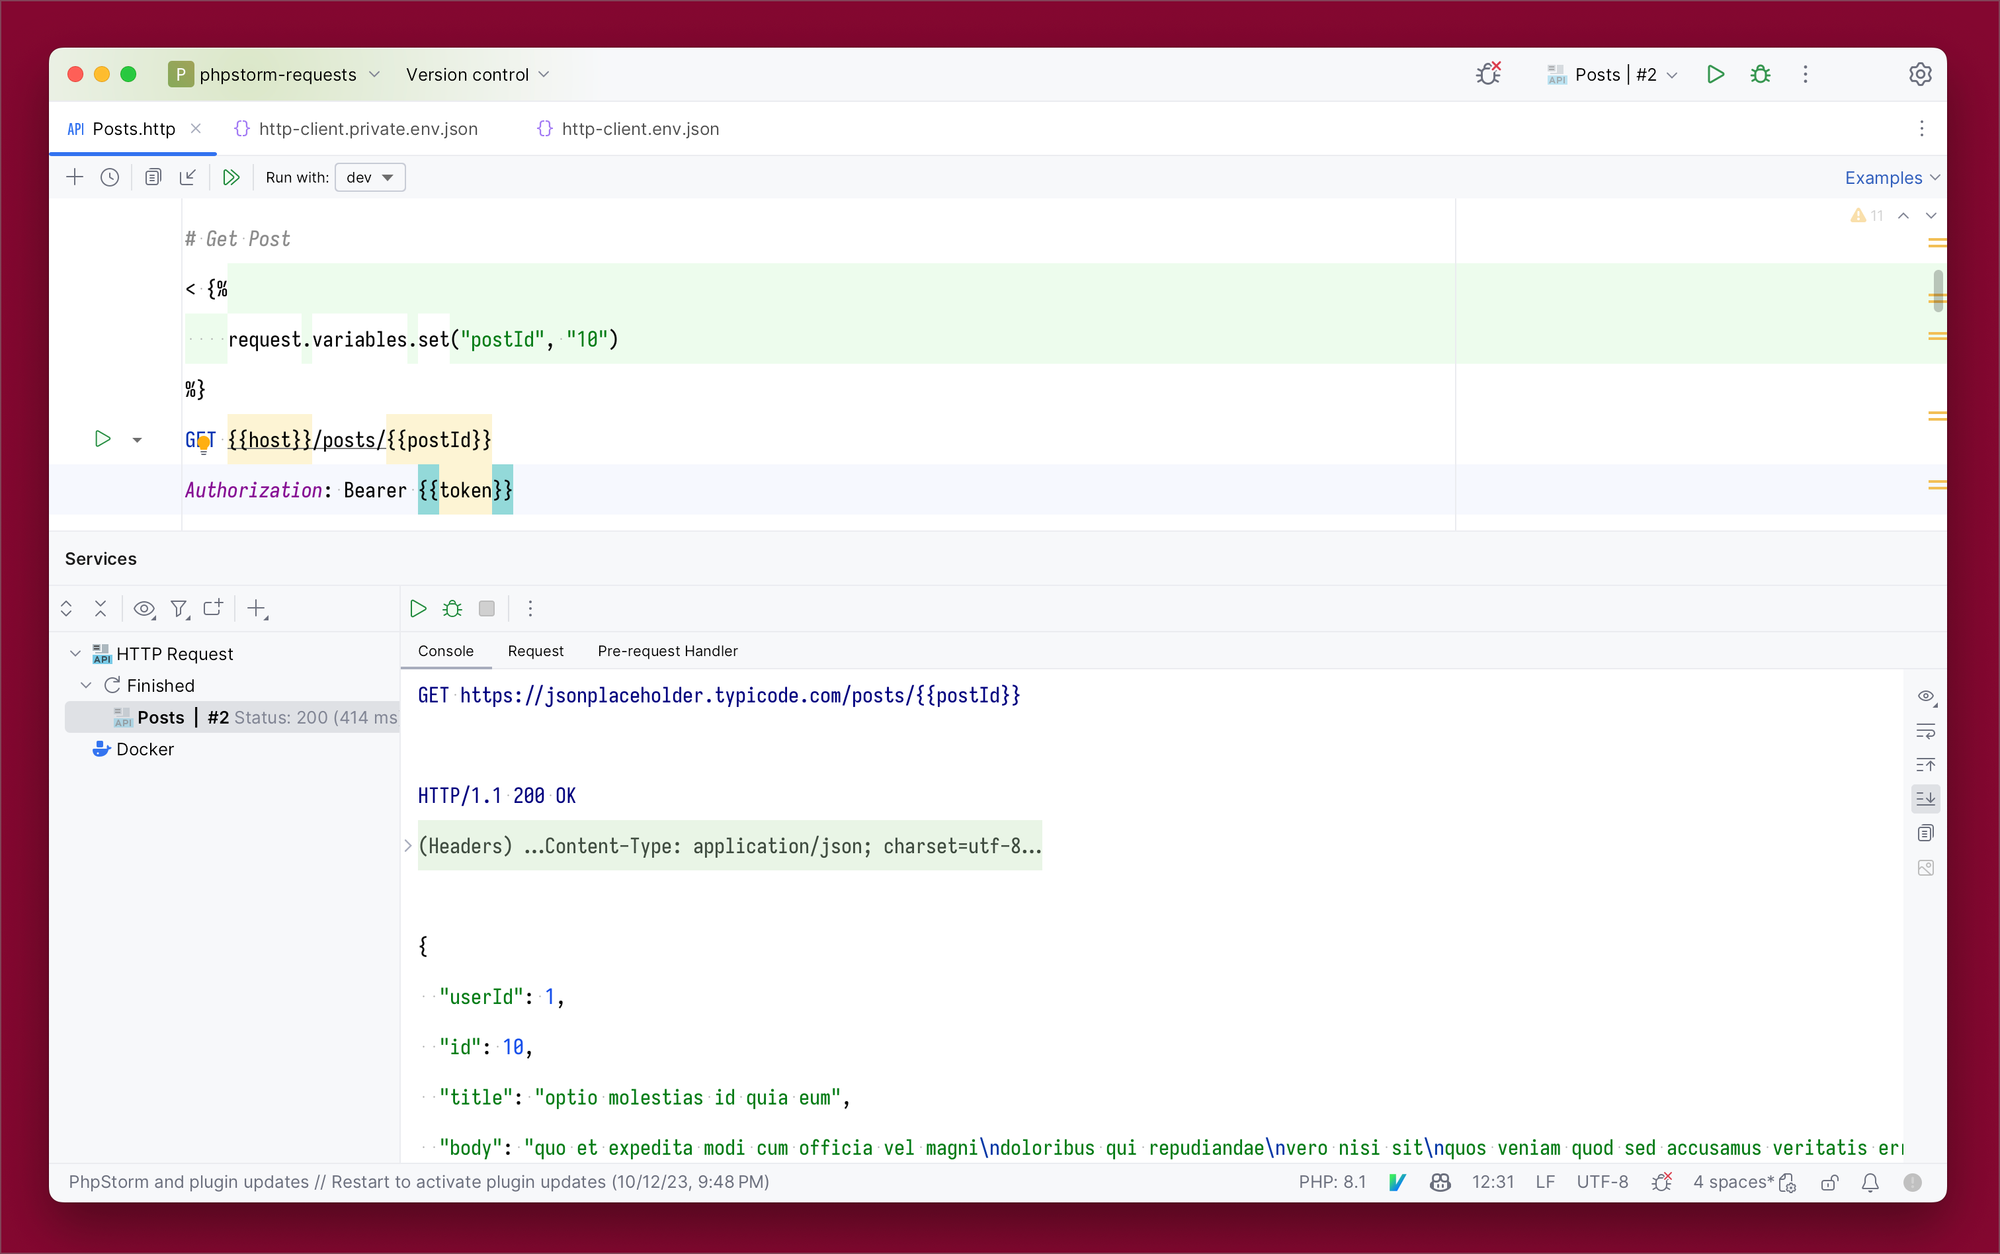
This method is particularly useful when I need to adjust variables for specific requests without affecting global environment variables.
Response Variables
Response variables can be really powerful. They allow me to set a new variable based on the response of a request. For example, after fetching the list of posts, I can create a new postId variable that grabs the first id from the lists of posts.
# List Posts
GET {{host}}/posts
Authorization: Bearer {{token}}

> {%
    client.global.set("postId", response.body[0].id);
%}
Now, if I wanted to test updating the first post from the list, I can do the following:
# Update Post
PUT {{host}}/posts/{{postId}}
Authorization: Bearer {{token}}
Content-Type: application/json

{
    "title": "New title"
}
The postId is set from previously calling the “List Posts” request, so it will be set to “1”. I can test by running the “Update Post” request.

When running the request, I can see in the console that the postId was replaced with “1” in the URL.
Dynamic Variables
Dynamic variables are kind of like helper variables. They allow automatically generating common data on the fly, like UUIDs, random integers, timestamps, and more.
As an example, if I want to delete a random post, I can use the $random.integer(1, 100) dynamic variable. This will generate a random number between 1 and 100.
# Delete Post
DELETE {{host}}/posts/{{$random.integer(1, 100)}}
Authorization: Bearer {{token}}
When running the request, I see the following output, where the random number is 96.

For a complete list of available dynamic variables, refer to the documentation.
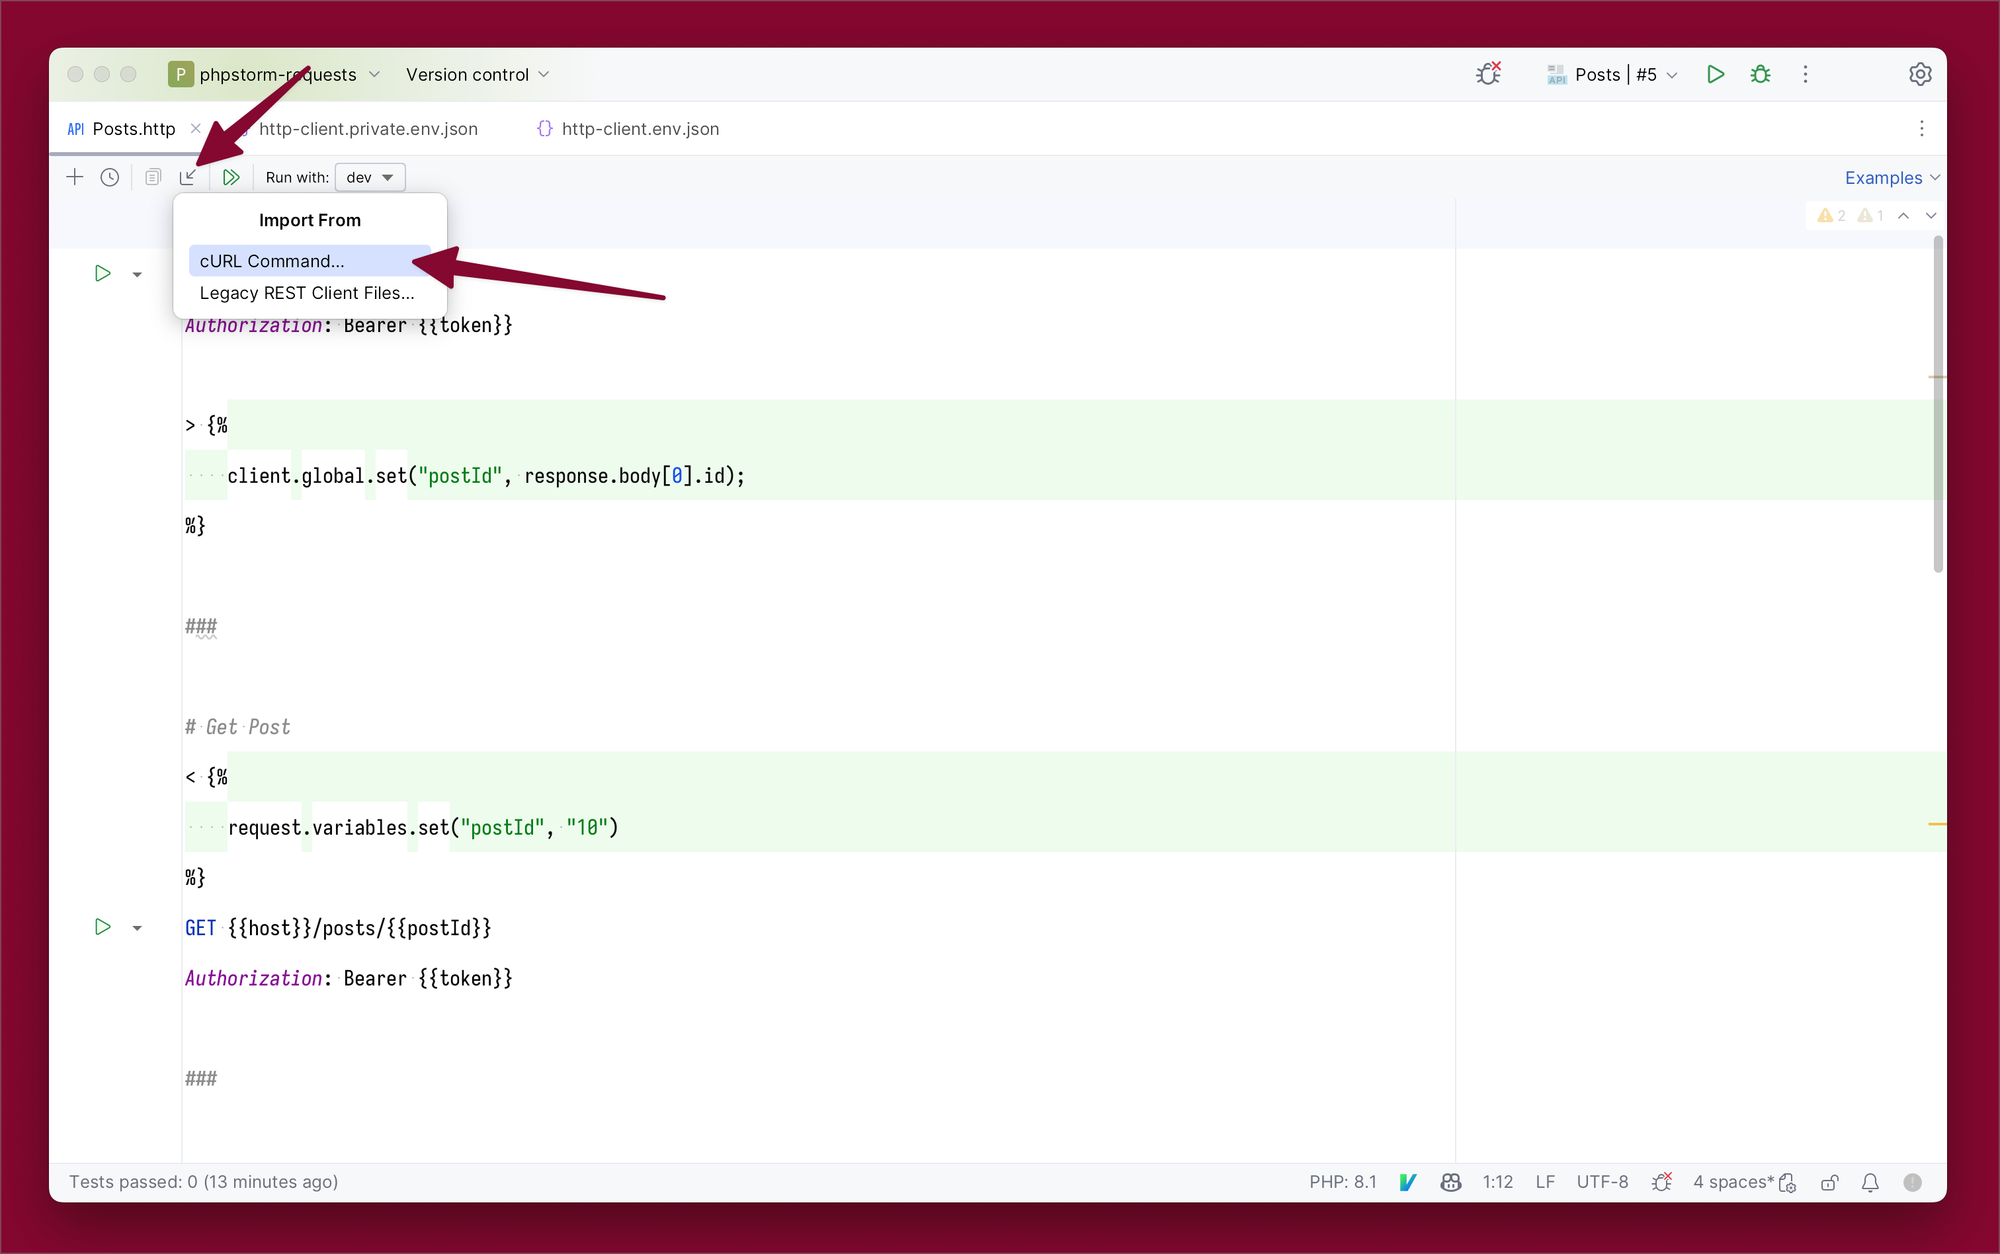
Importing and Exporting Requests
PhpStorm's built-in HTTP client simplifies importing and exporting requests, making it easy to transition my workflow. It handles importing cURL requests and even Postman collections.
cURL
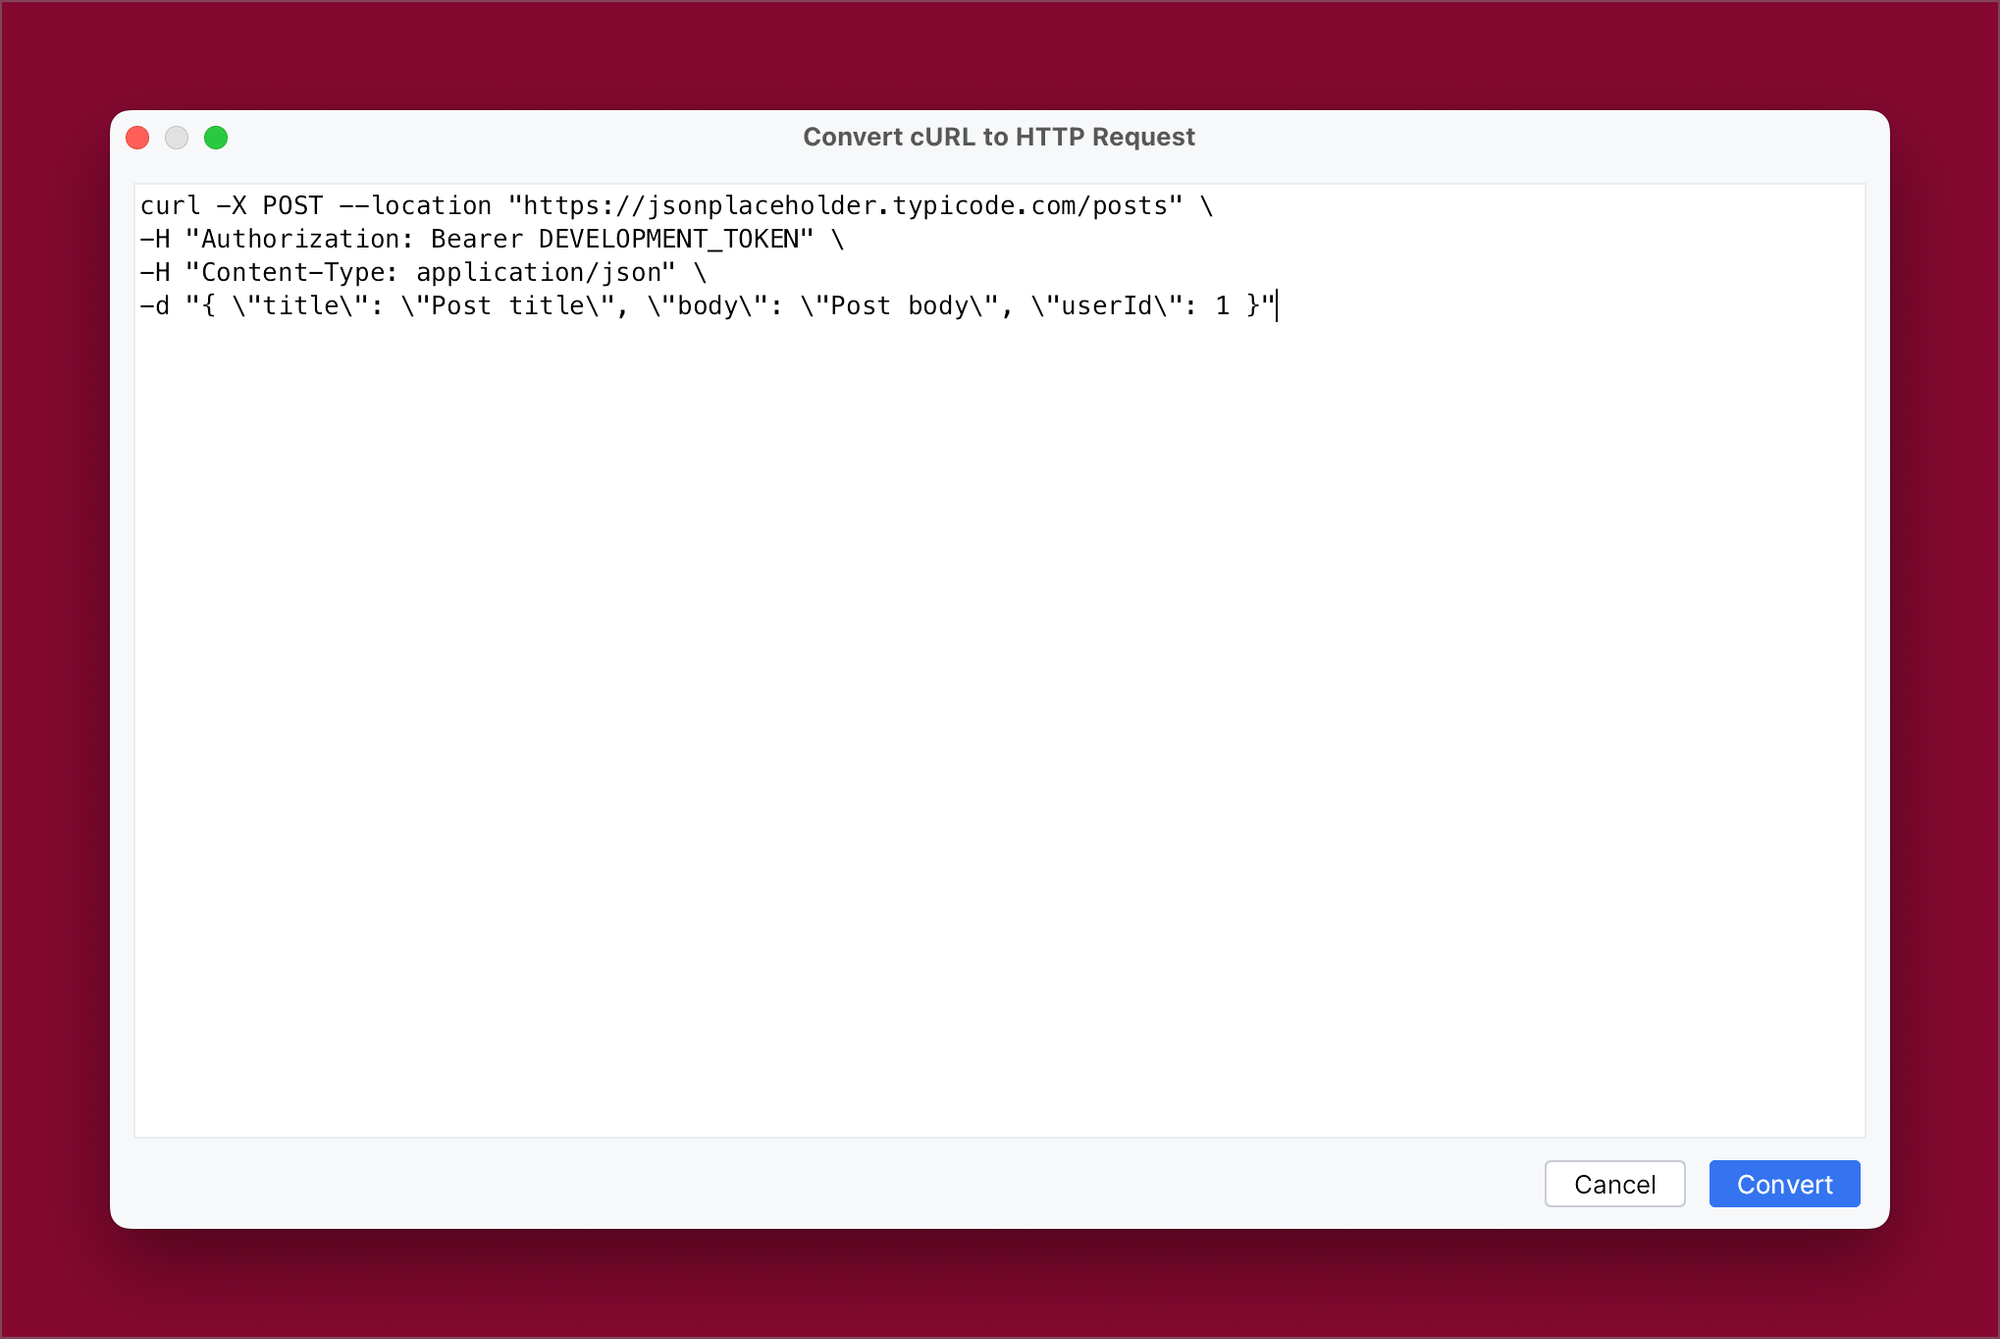
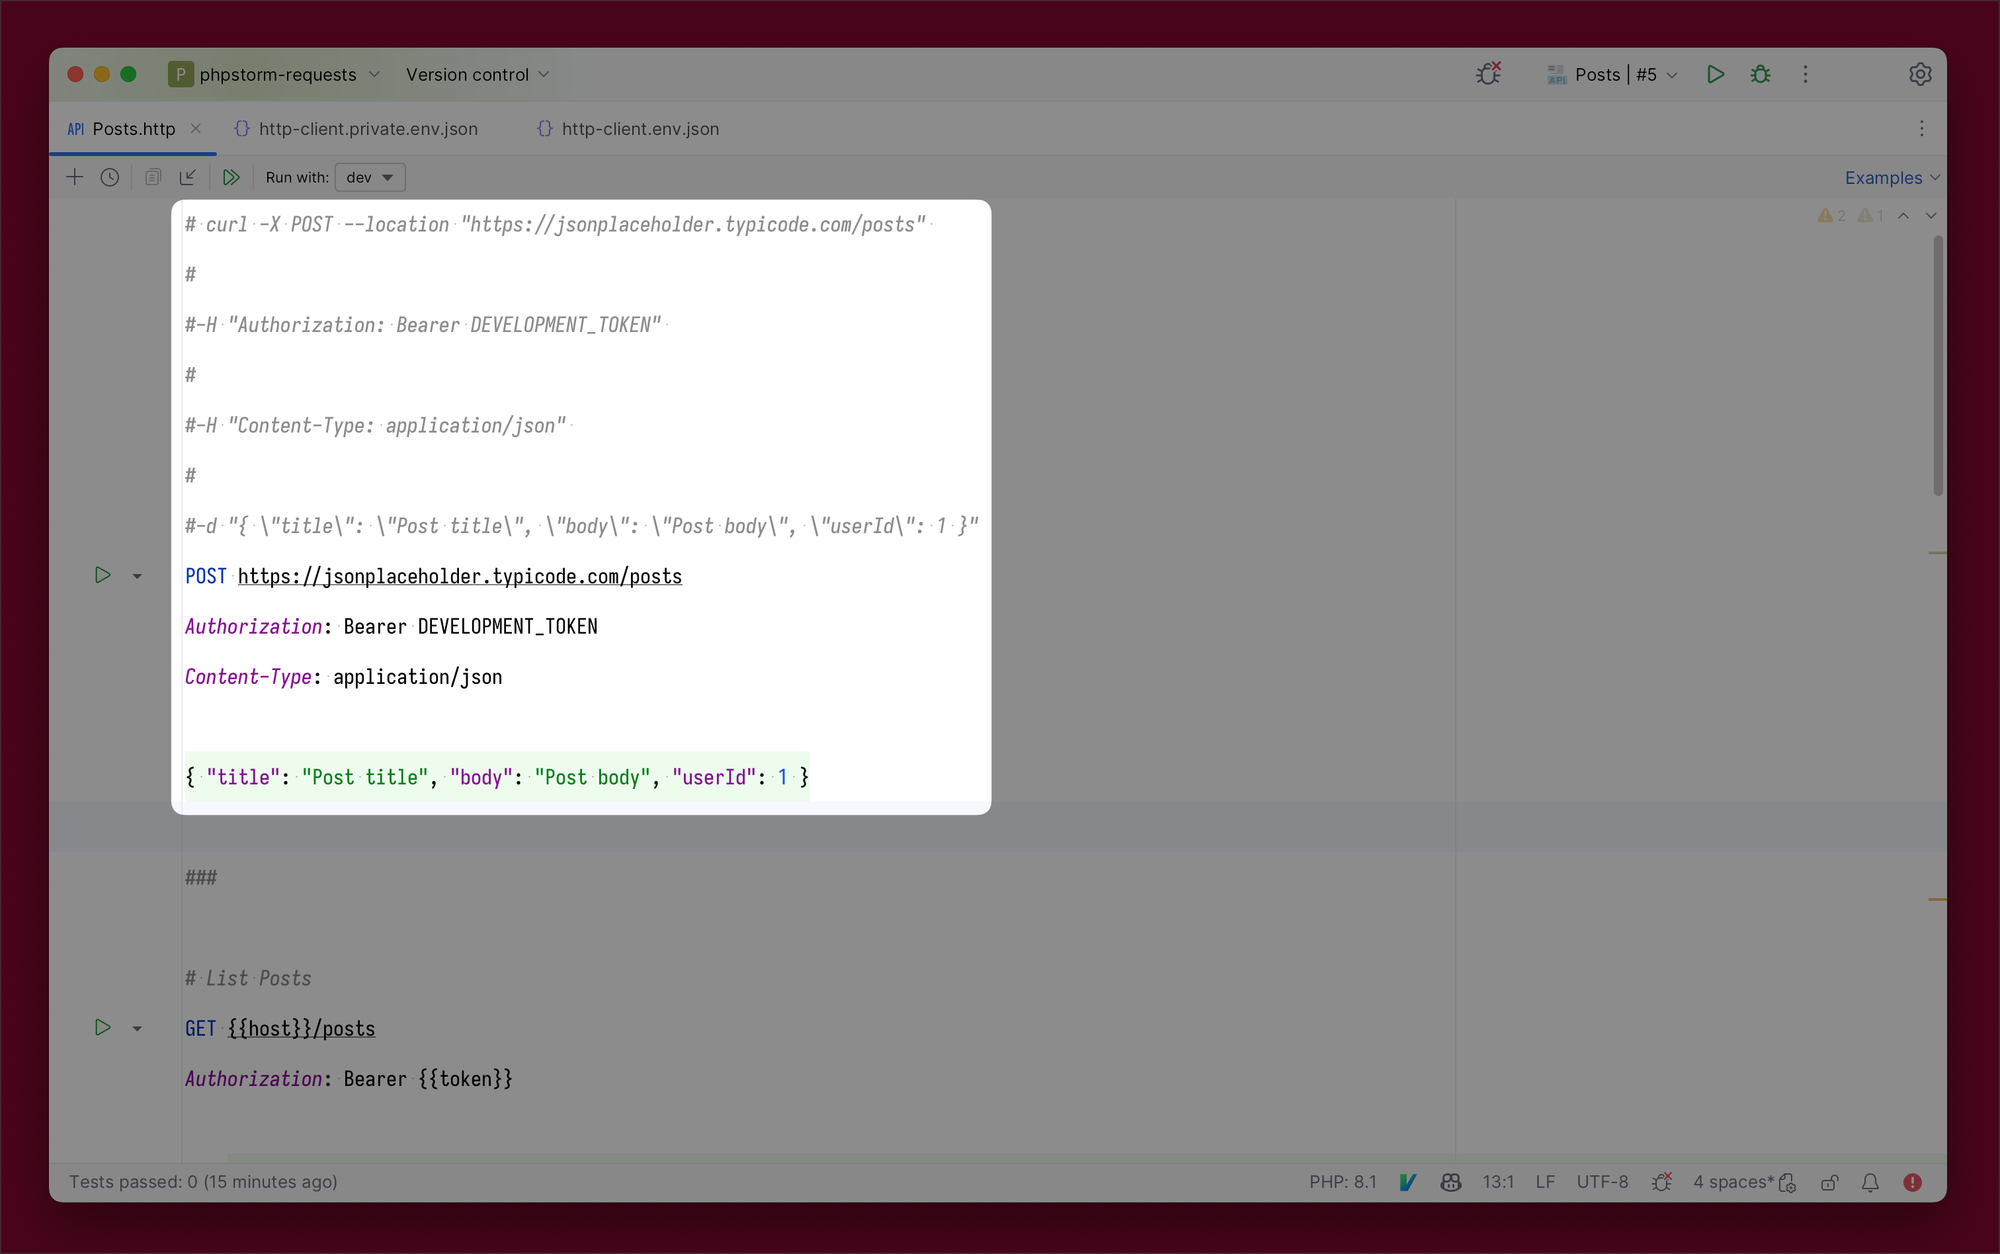
With the following cURL code, I can import it right into a request file.
curl -X POST --location "<https://jsonplaceholder.typicode.com/posts>" \\
-H "Authorization: Bearer DEVELOPMENT_TOKEN" \\
-H "Content-Type: application/json" \\
-d "{ \\"title\\": \\"Post title\\", \\"body\\": \\"Post body\\", \\"userId\\": 1 }"
To import, I click the import button and select the import type, cURL for this example.
This will bring up a new window to paste in the cURL code.
After clicking convert, the cURL request is now added to the file as an HTTP request.
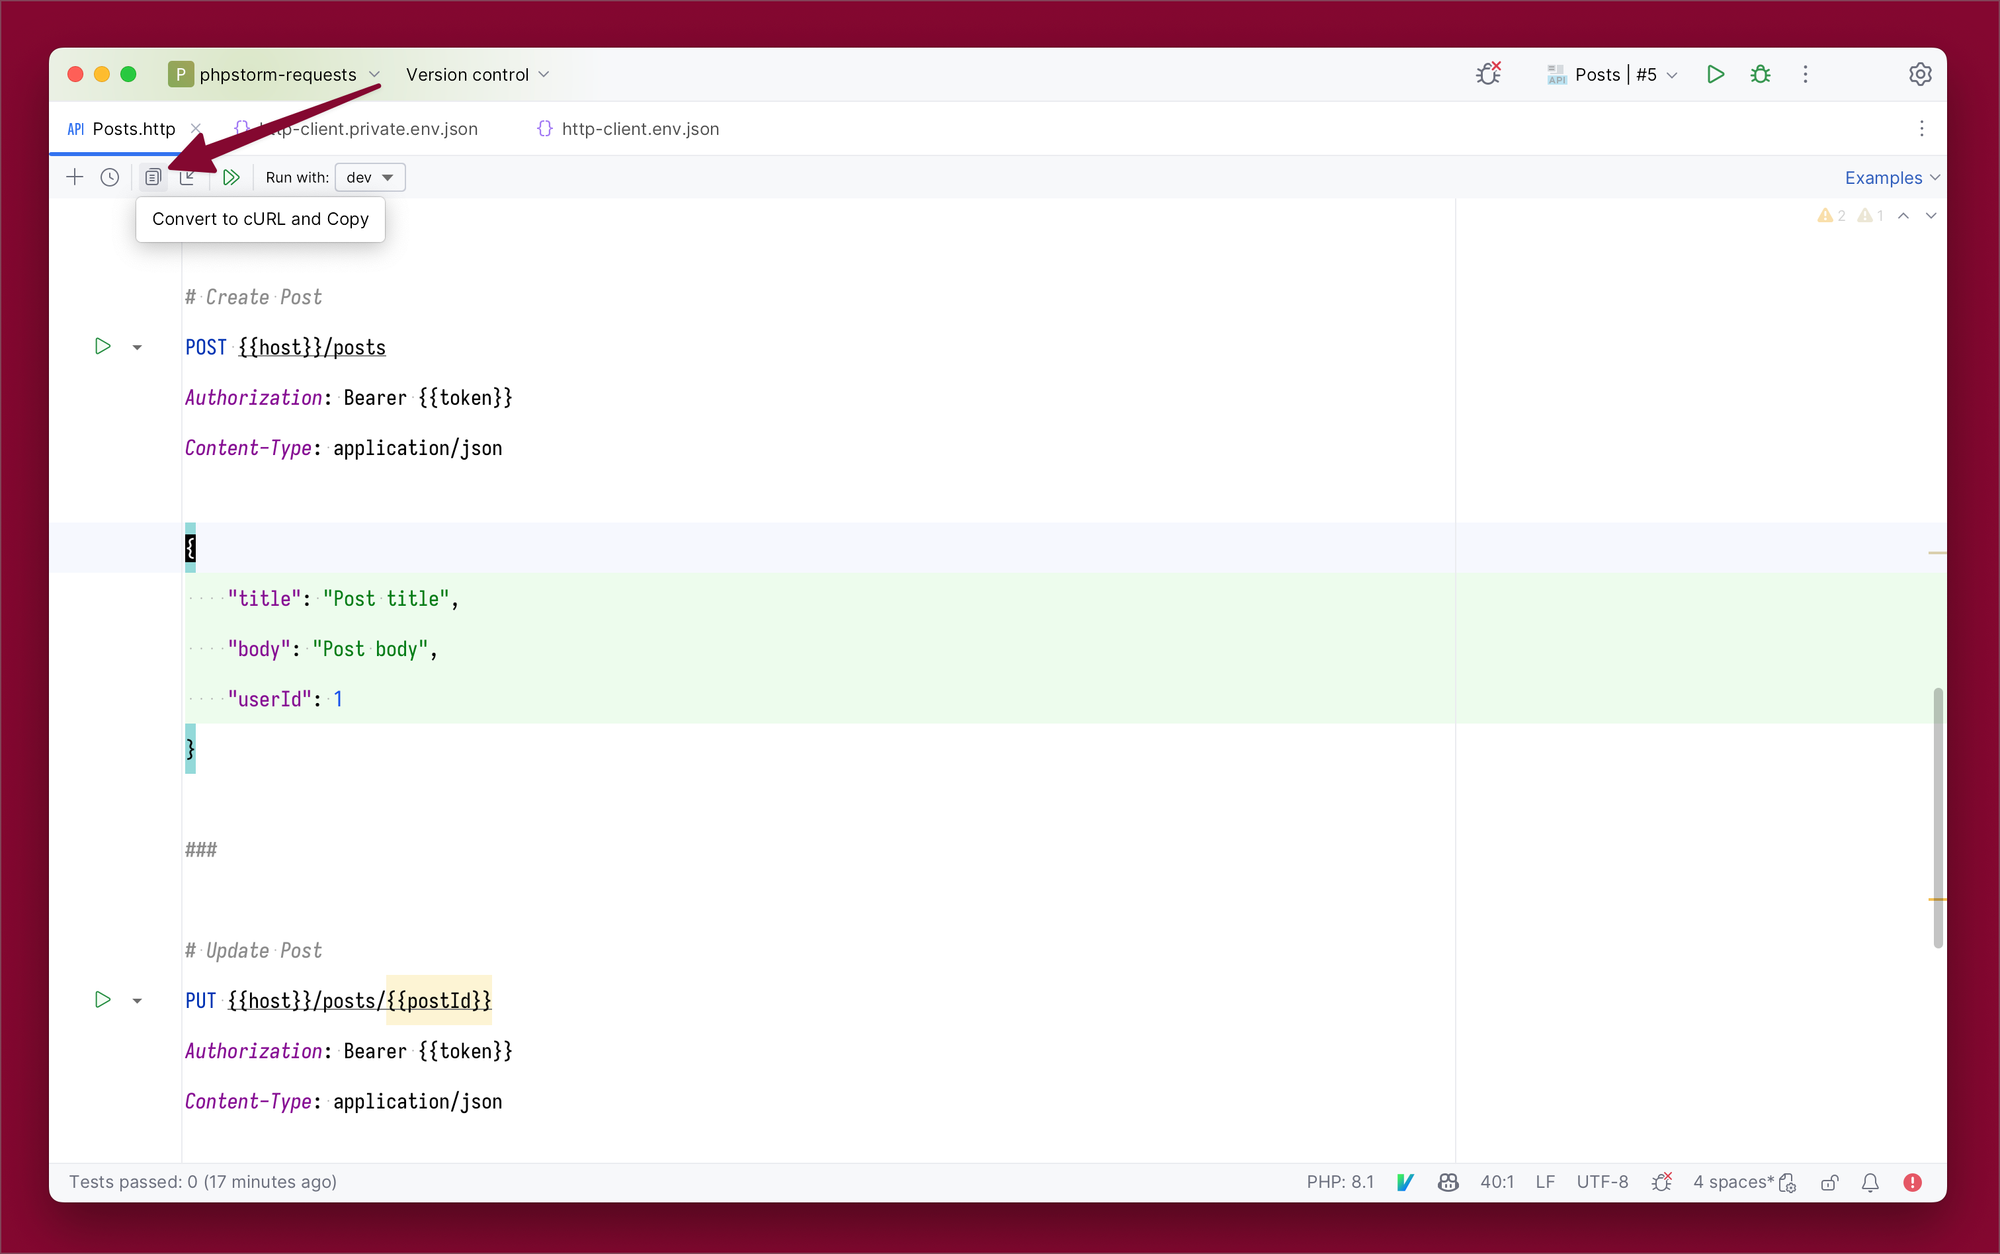
For exporting requests, I simply click the export button, select the environment to use for variable conversion, and the cURL code for the request is copied automatically.
Postman
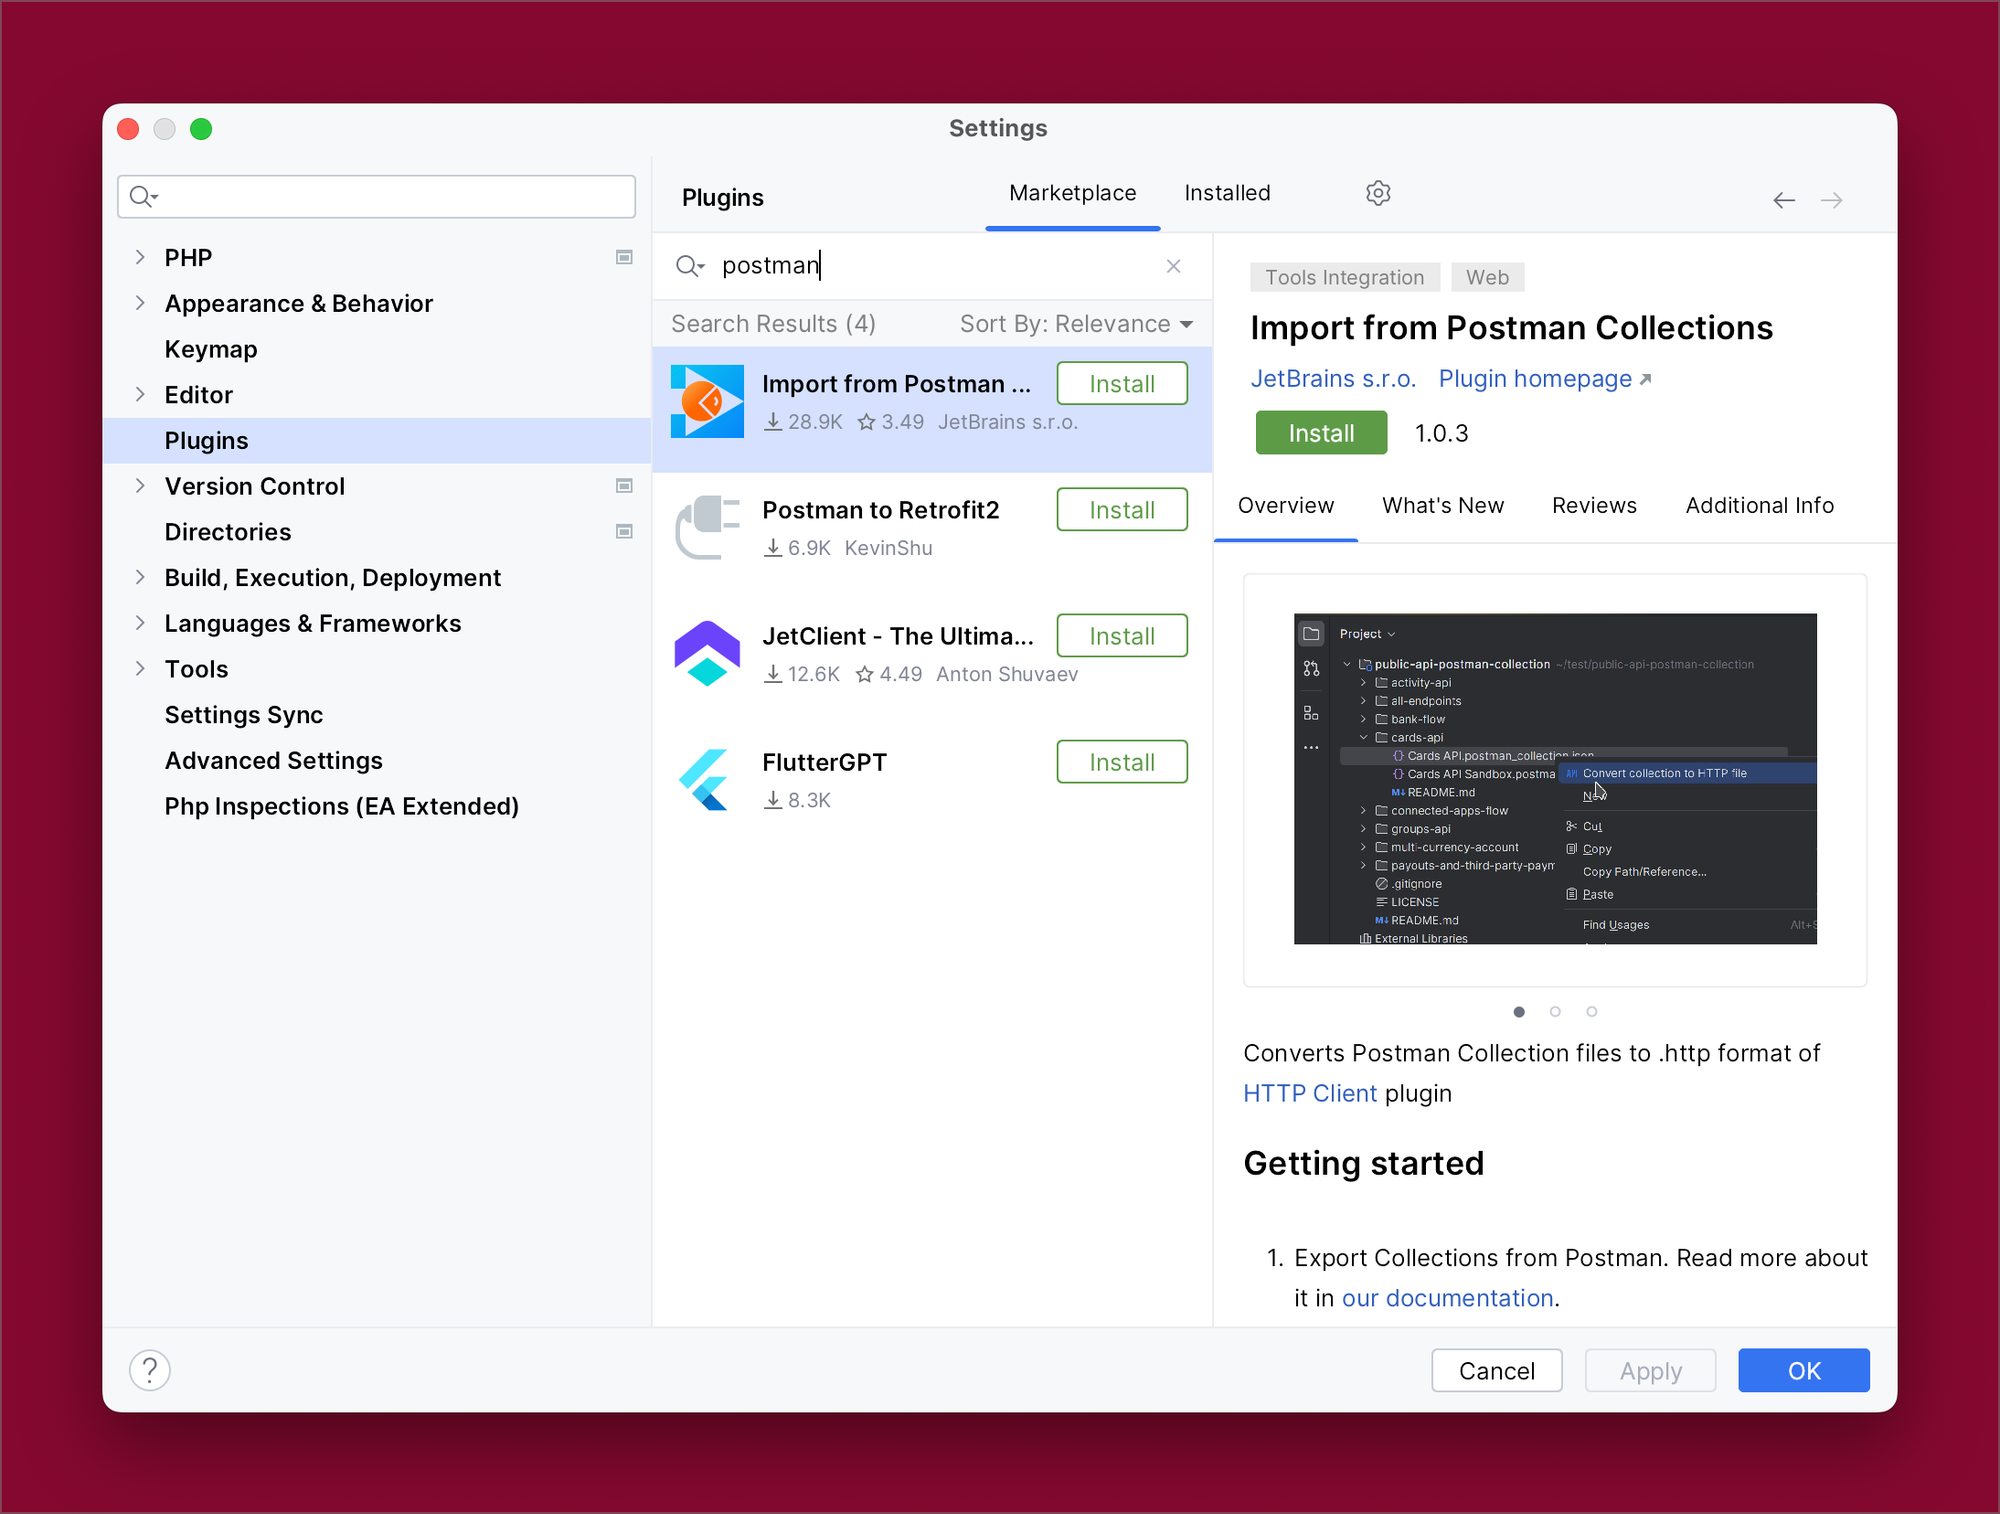
If I'm transitioning from Postman, JetBrains offers a plugin that allows me to import Postman collections into PhpStorm's HTTP requests. This plugin can ease the migration process.
Conclusion
PhpStorm's built-in HTTP client and requests functionality offers an array of features that have significantly enhanced my API testing process. Beyond simplifying basic requests, I can execute JavaScript logic within < {% %} blocks, handle cookies, and even accommodate GraphQL requests. This all-in-one approach saves me the hassle of switching between different applications like Postman or Insomnia.
For more in-depth information and additional features, consult the PhpStorm documentation:
Thank you for joining me on this journey exploring PhpStorm’s HTTP client and requests!