Neovim for PHP and Laravel
Configure a Neovim development environment using LazyVim for PHP and Laravel.
Contents
If you’ve ever wanted to use Neovim for PHP and Laravel development, this guide should help get you started. If you use VSCode, then check out this post.
In this post, I will be using Neovim with LazyVim. LazyVim is a fantastic Neovim setup with many features and tools out of the box. I’ve spent more time than I’d like to admit configuring Vim and Neovim. LazyVim cuts almost all that time out. As you start to become comfortable configuring LazyVim, you can consider creating your own configuration from scratch.
Installation
This post assumes you are using the latest version of Neovim (v0.10.0 at the time of publishing). If you need to install it, you can grab it for your OS here.
Once you have Neovim installed, we are going to use LazyVim. You are welcome to use your configuration if you would rather not use LazyVim, but that setup is a lot more complex for this post.
To install LazyVim, you’ll want to clone the repo and move it to your Neovim configuration folder, (~/.config/nvim on MacOS/Linux).
git clone https://github.com/LazyVim/starter ~/.config/nvimOnce cloned, you can remove the .git folder since you won’t need it now and may want to version control your configuration changes.
rm -rf ~/.config/nvim/.gitIf you are using Windows, you can follow the installation instructions here.
Once that is done, you can run Neovim, and it will pull down all the plugins and dependencies for LazyVim
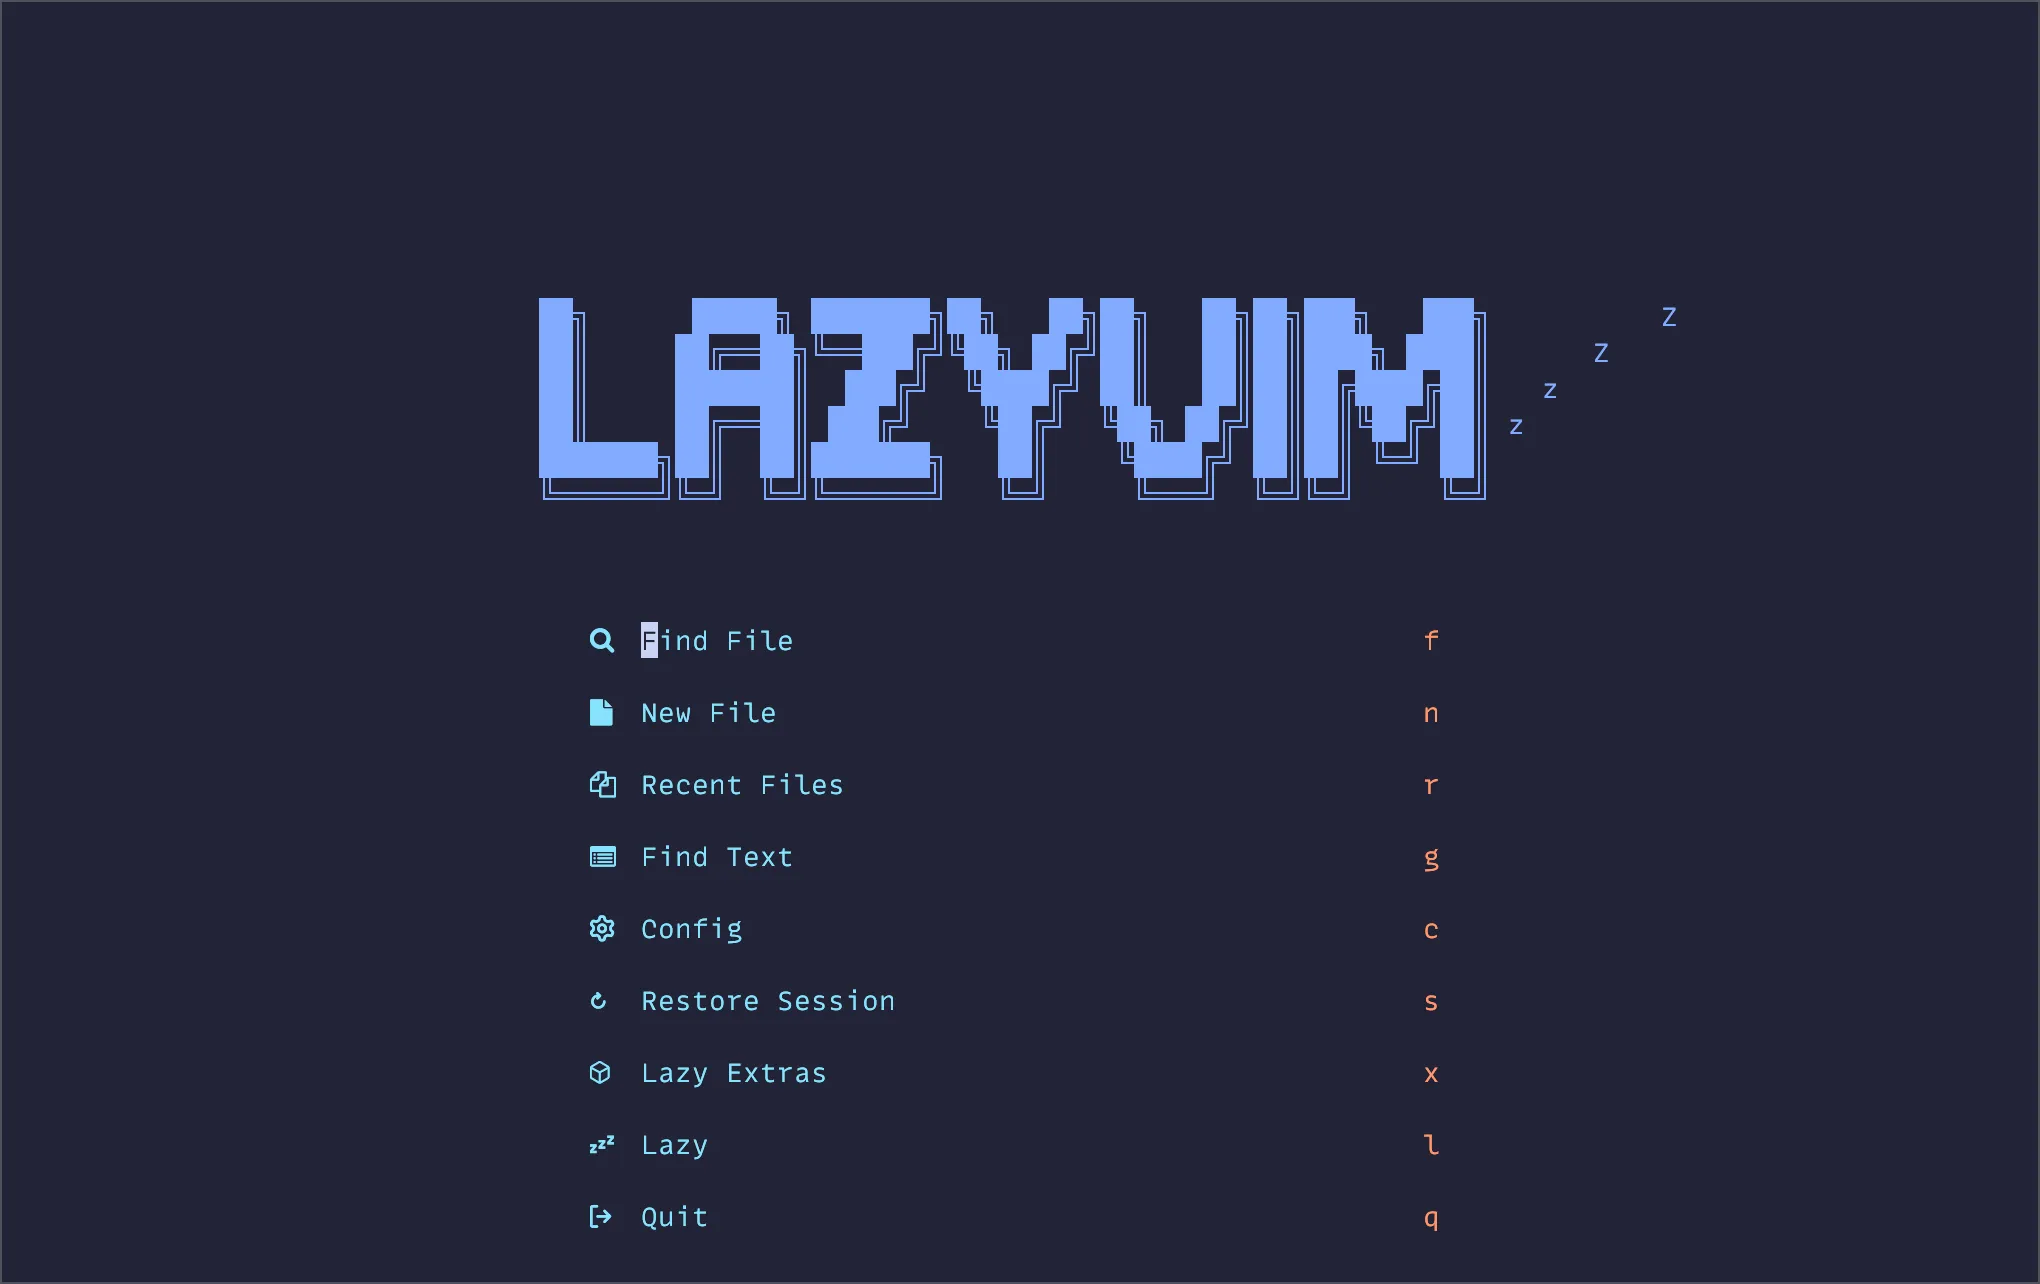

Out of the box, LazyVim gives a nice menu to navigate around as needed.
LazyVim PHP Extras
LazyVim recently added an update to quickly add PHP support. You just need to click x from the home screen to get to the extras menu or type :LazyExtras.
From the menu, you can search for PHP by first typing a slash, then php, so /php. The / begins searches in Neovim.
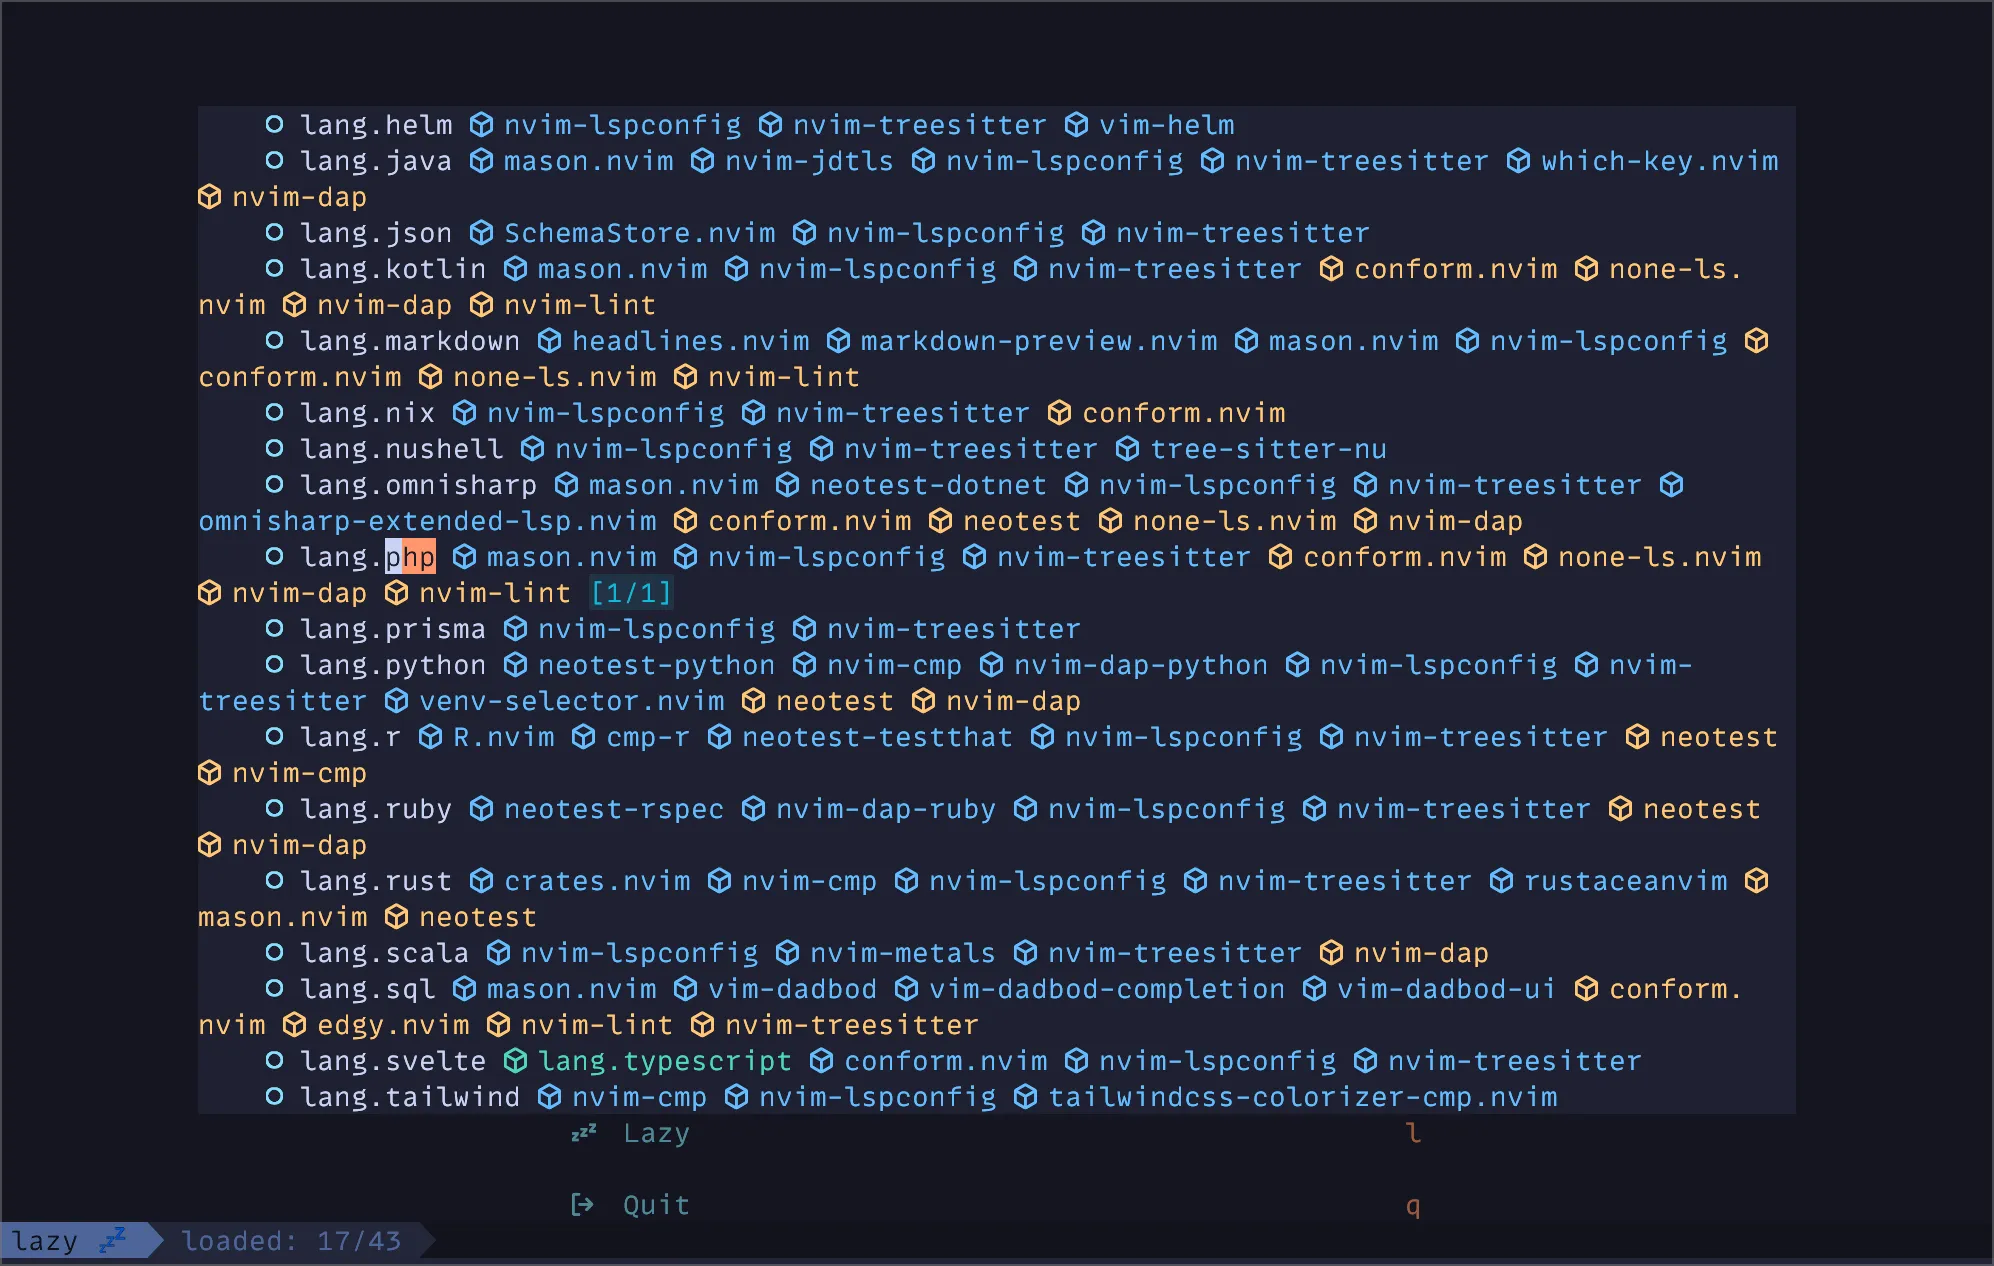
With your cursor on the lang.php line, hit x to toggle the extra. Then restart Neovim. Now, Neovim will support PHP syntax and install the Phpactor LSP.

To test the LSP, I created a new Laravel project with Laravel Breeze. From the project directory, open Neovim and open the ProfileController by using <leader>ff. In Neovim, many keyboard commands are prefixed with the <leader> key, which is set to space by default. So to find a file, type space + f + f. Then, you can just search using the fuzzy finder.
When loading the controller for the first time, Phpactor will start to index your codebase, typically from the Git root of the project.
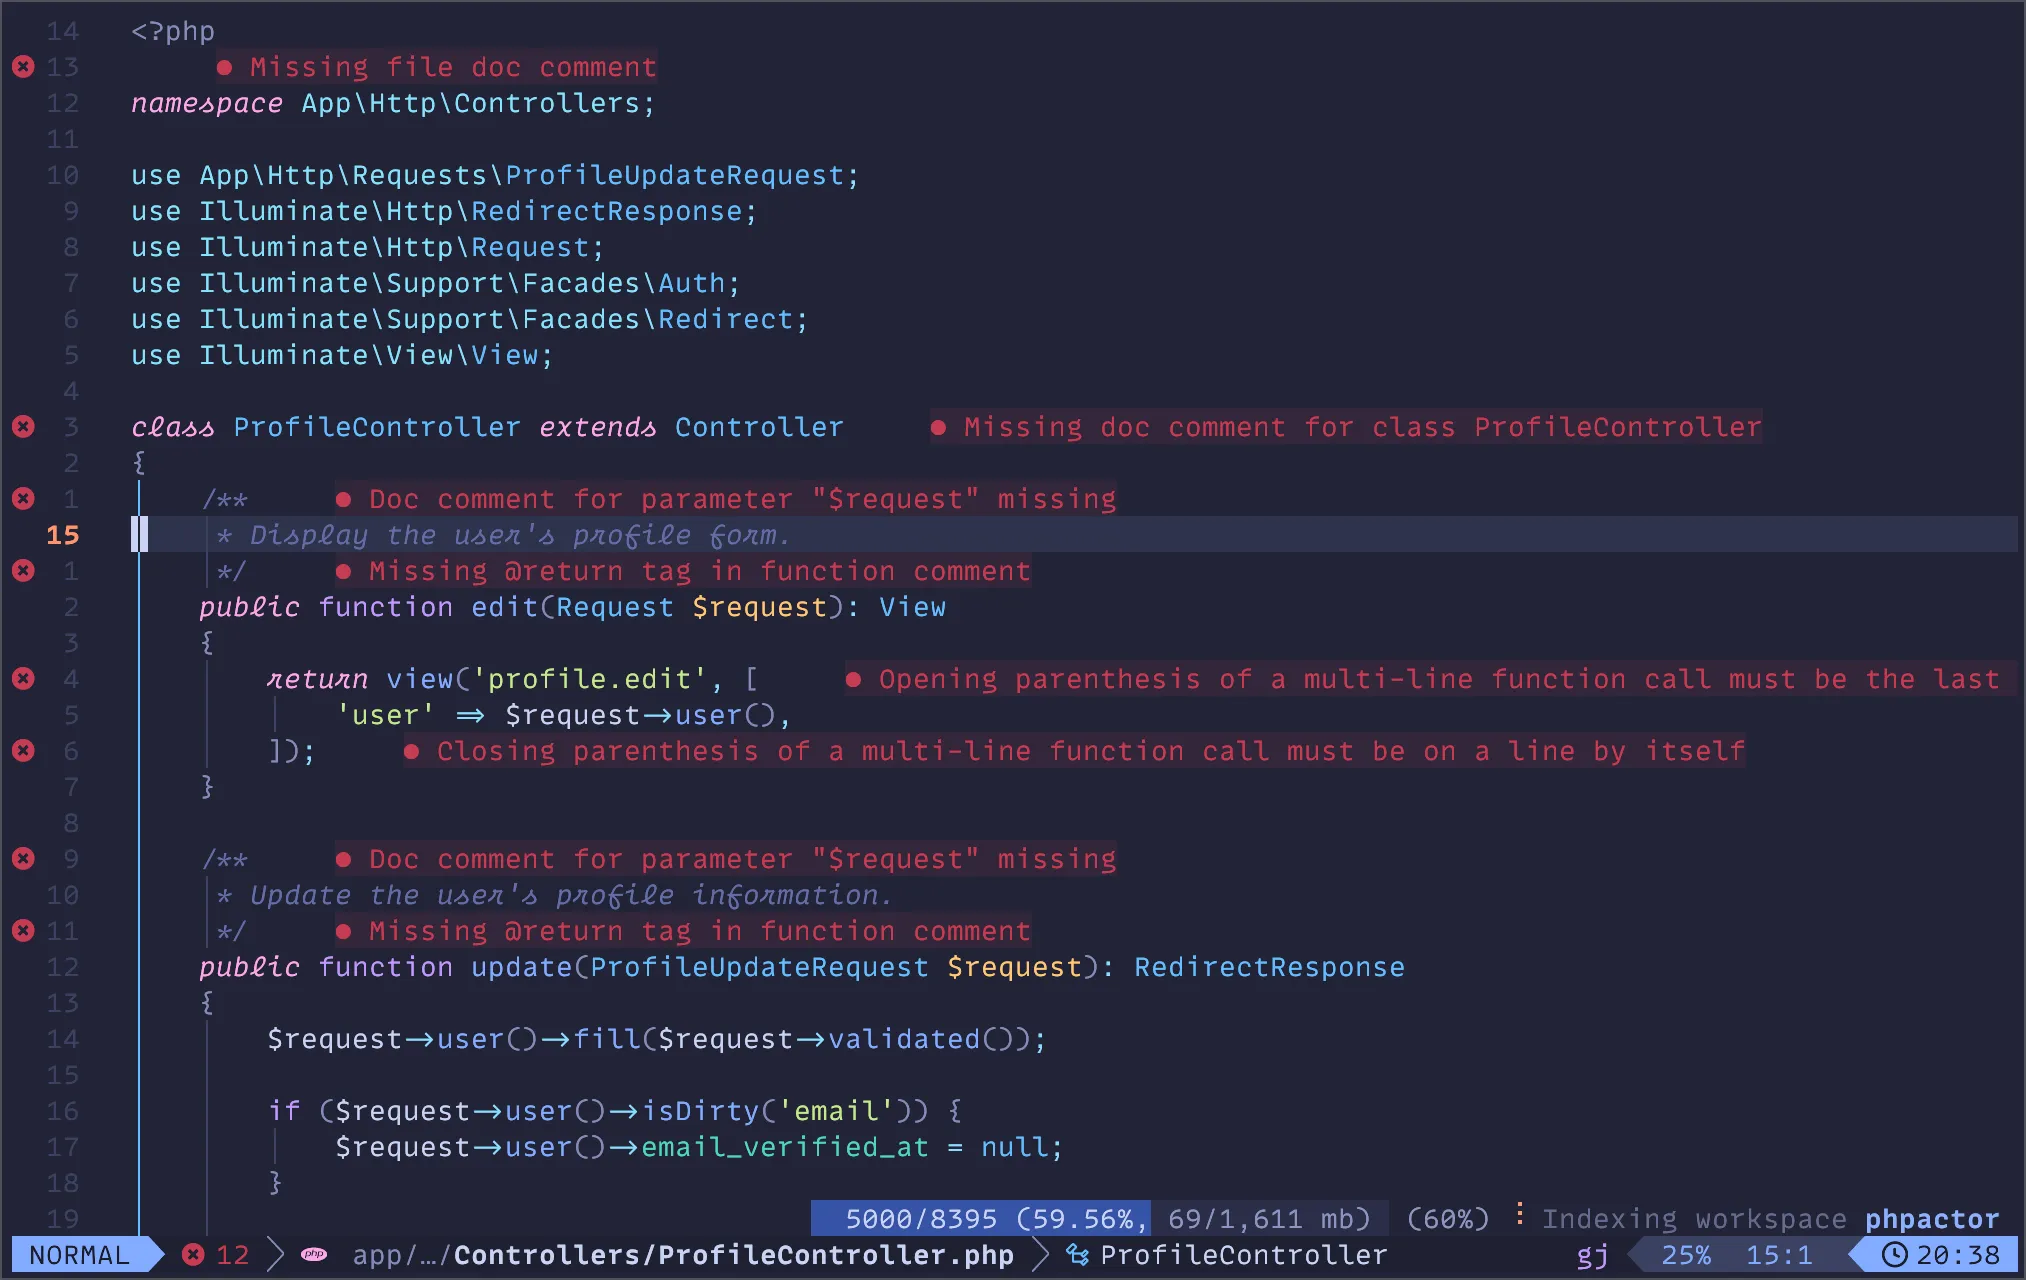
You’ll also see many errors and other diagnostics. These are being provided by the LSP along with code completion, go to definition, refactoring, and many other features.
If you want to modify the base controller, you can navigate to Controller and click gd for Goto Definition.

After Goto Definition, you can go back down to the class definition and click gr to Goto References for the Controller class. Next, you can use ctrl+o to jump back to your previous locations.
Please don’t hesitate to keep using Phpactor if it works for you. It struggles with some of the magic and missing types in Laravel but it is completely free and open source. You can improve this by using something like Laravel IDE Helper which generates stubs for models, facades, and other framework features to give better auto-completion.
Personally, I’ve had a better experience using the Intelephense LSP, which you’re probably familiar with if you’re coming from VSCode. Unfortunately, you do miss some features of Phpactor without the premium version of Intelephense, so I do recommend the purchase if you use Intelephense. A single license works VSCode, Neovim, and any other editors that support LSPs.
To set up Intelephense, you’ll need to modify the LazyVim configuration. In the ~/.config/nvim folder, open options.lua and add the following line:
vim.g.lazyvim_php_lsp = "intelephense"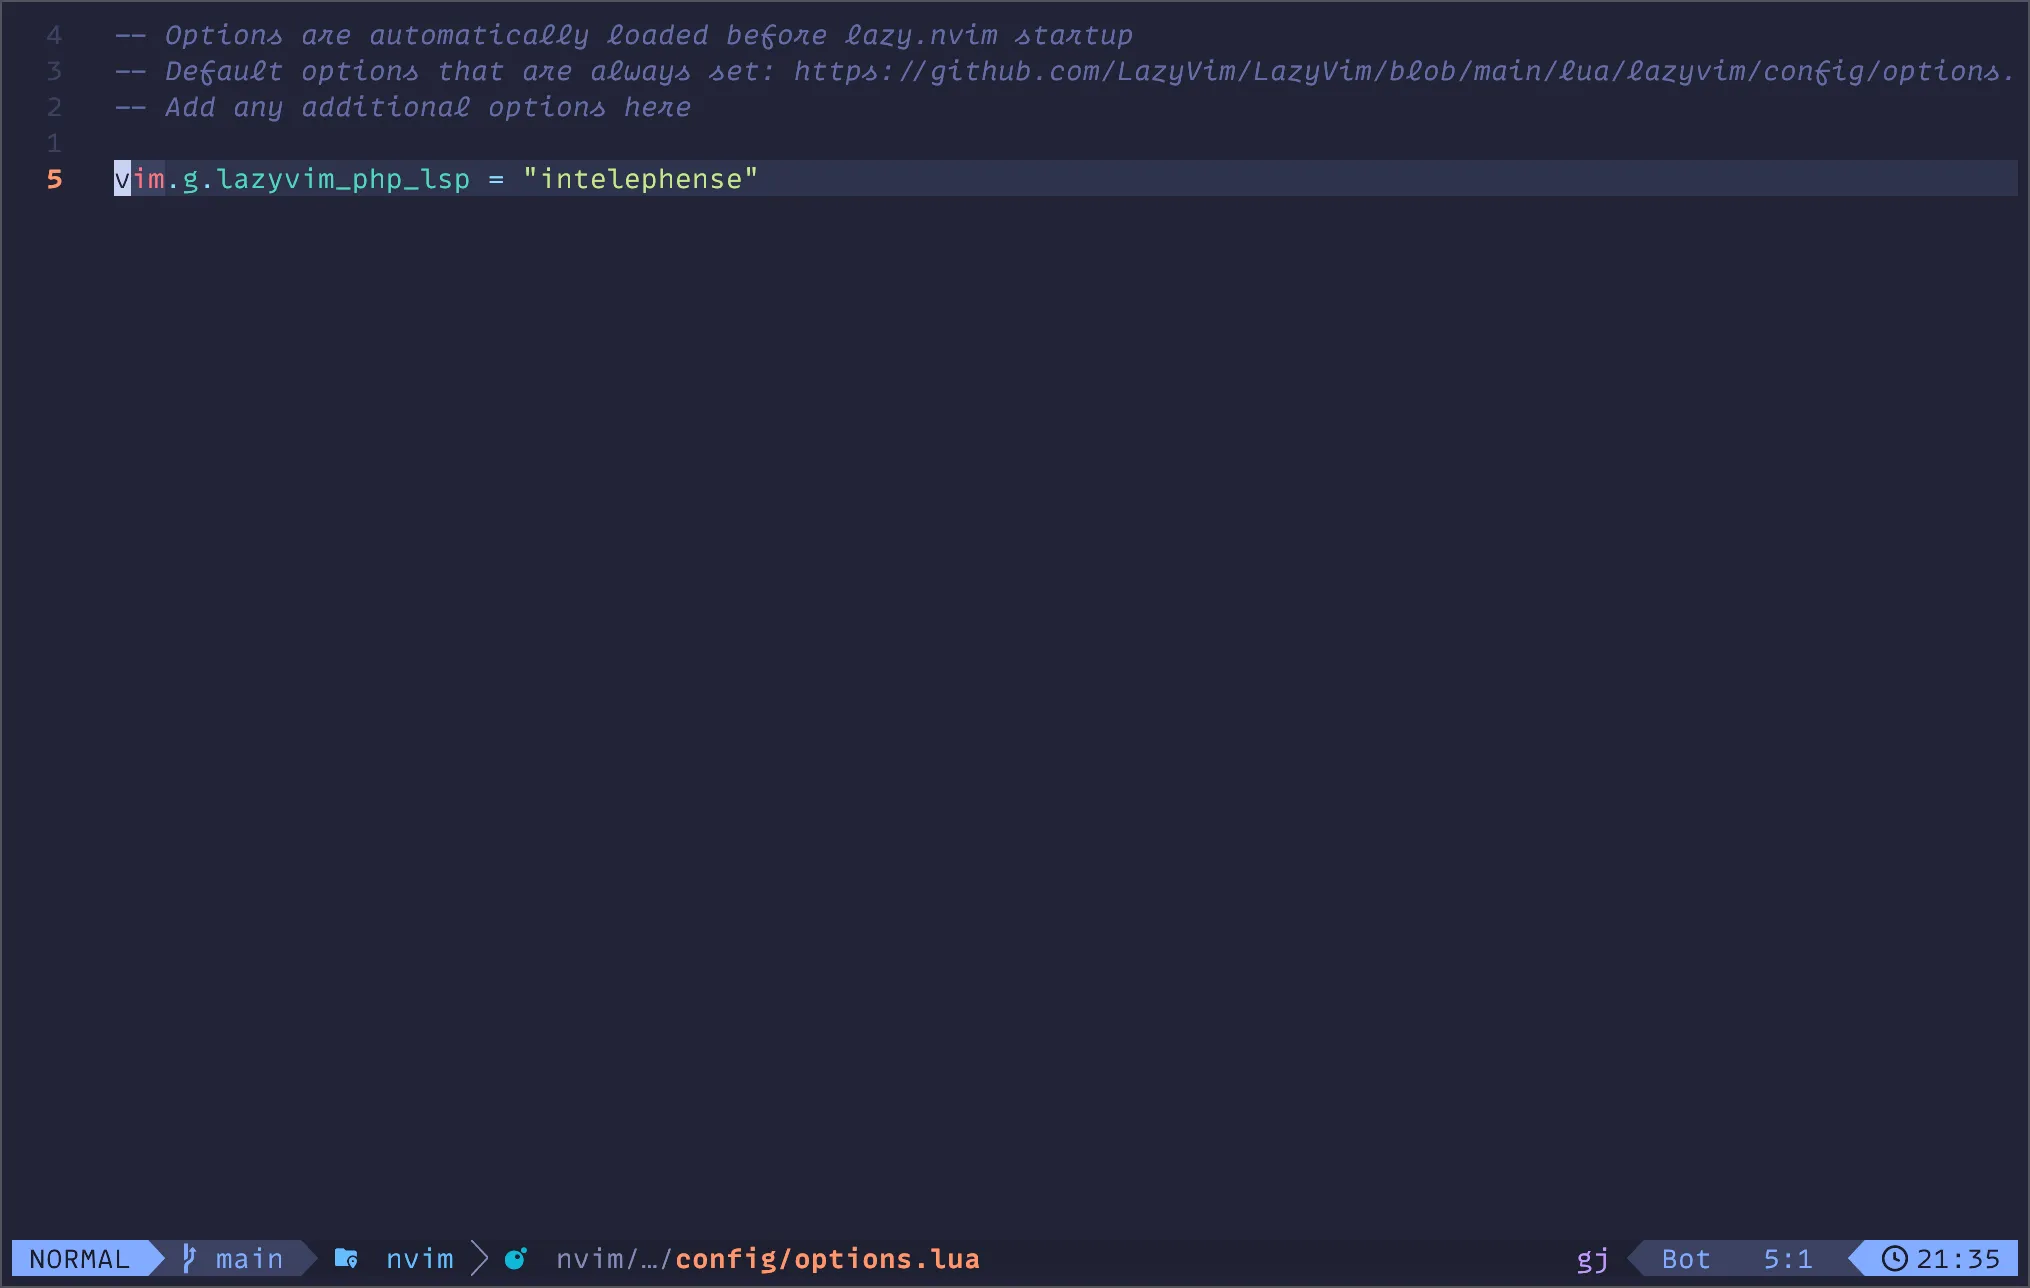
This tells LazyVim to set up Intelephense. You may need to remove Phpactor, though. To accomplish that, you can type <leader>cm which opens Mason. Mason is a tool for installing various formatters, linters, and LSPs. From the Mason menu, find Phpactor and uninstall it by using X.
Setup Laravel Pint Formatting
Since we installed the Lazy Extras for PHP, Laravel Pint and PHP-CS-Fixer have been installed. However, PHP-CS-Fixer is set as the default. To change this, we can create a new file in the Neovim config: ~/.config/nvim/lua/plugins/php.lua. You can name this file whatever you want, but for this post, we’ll use it for all of our PHP/Laravel related configuration.
In the file, you can include the following:
return {
  {
    "stevearc/conform.nvim",
    optional = true,
    opts = {
      formatters_by_ft = {
        php = { { "pint", "php_cs_fixer" } },
      },
    },
  },
}
This makes Pint the default formatter, and it will fall back to PHP-CS-Fixer if not found. With this change, I can go back to the ProfileController and add an unused import and mess up indentation, and saving will trigger a format.
Another optional change you can make is to remove phpcs if you don’t use it. In the php.lua file, just add another block like the following:
return {
  {
    -- Set Laravel Pint as the default PHP formatter with PHP CS Fixer as a fall back.
    "stevearc/conform.nvim",
    optional = true,
    opts = {
      formatters_by_ft = {
        php = { { "pint", "php_cs_fixer" } },
      },
    },
  },
  {
    -- Remove phpcs linter.
    "mfussenegger/nvim-lint",
    optional = true,
    opts = {
      linters_by_ft = {
        php = {},
      },
    },
  },
}
I am grabbing these configurations right from the LazyVim docs.
Testing
Next, we’ll set up Neatest so we can run tests from right in Neovim. This is another LazyVim extra that can be added by typing :LazyExtras and then searching for “test.core” and toggling with X.
Then, we need to install the Neotest Pest plugin. Add the following block to the php.lua configuration.
return {
  {
    ...
  },
  {
    -- Add neotest-pest plugin for running PHP tests.
    -- A package is also available for PHPUnit if needed.
    "nvim-neotest/neotest",
    dependencies = { "V13Axel/neotest-pest" },
    opts = { adapters = { "neotest-pest" } },
  }
}
With the testing config in place, load up a test file, and you can run individual tests with <leader>tr or the whole file with <leader>tt.

Use <leader>to to toggle a summary of the test results.
Blade Syntax
Adding support for Laravel Blade is a little more involved. LazyVim has Treesitter setup to support syntax highlighting for most languages. However, Blade is not installed by default, so we need to add it.
return {
  {
    ...
  },
  {
    -- Add a Treesitter parser for Laravel Blade to provide Blade syntax highlighting.
    "nvim-treesitter/nvim-treesitter",
    opts = function(_, opts)
      vim.list_extend(opts.ensure_installed, {
        "blade",
        "php_only",
      })
    end,
    config = function(_, opts)
      vim.filetype.add({
        pattern = {
          [".*%.blade%.php"] = "blade",
        },
      })

      require("nvim-treesitter.configs").setup(opts)
      local parser_config = require("nvim-treesitter.parsers").get_parser_configs()
      parser_config.blade = {
        install_info = {
          url = "https://github.com/EmranMR/tree-sitter-blade",
          files = { "src/parser.c" },
          branch = "main",
        },
        filetype = "blade",
      }
    end,
  },
}
We extend the default Treesitter config to set a new filetype and pull down the Blade parser.
Once we restart Neovim, you can run :TSInstall blade to download the parser.
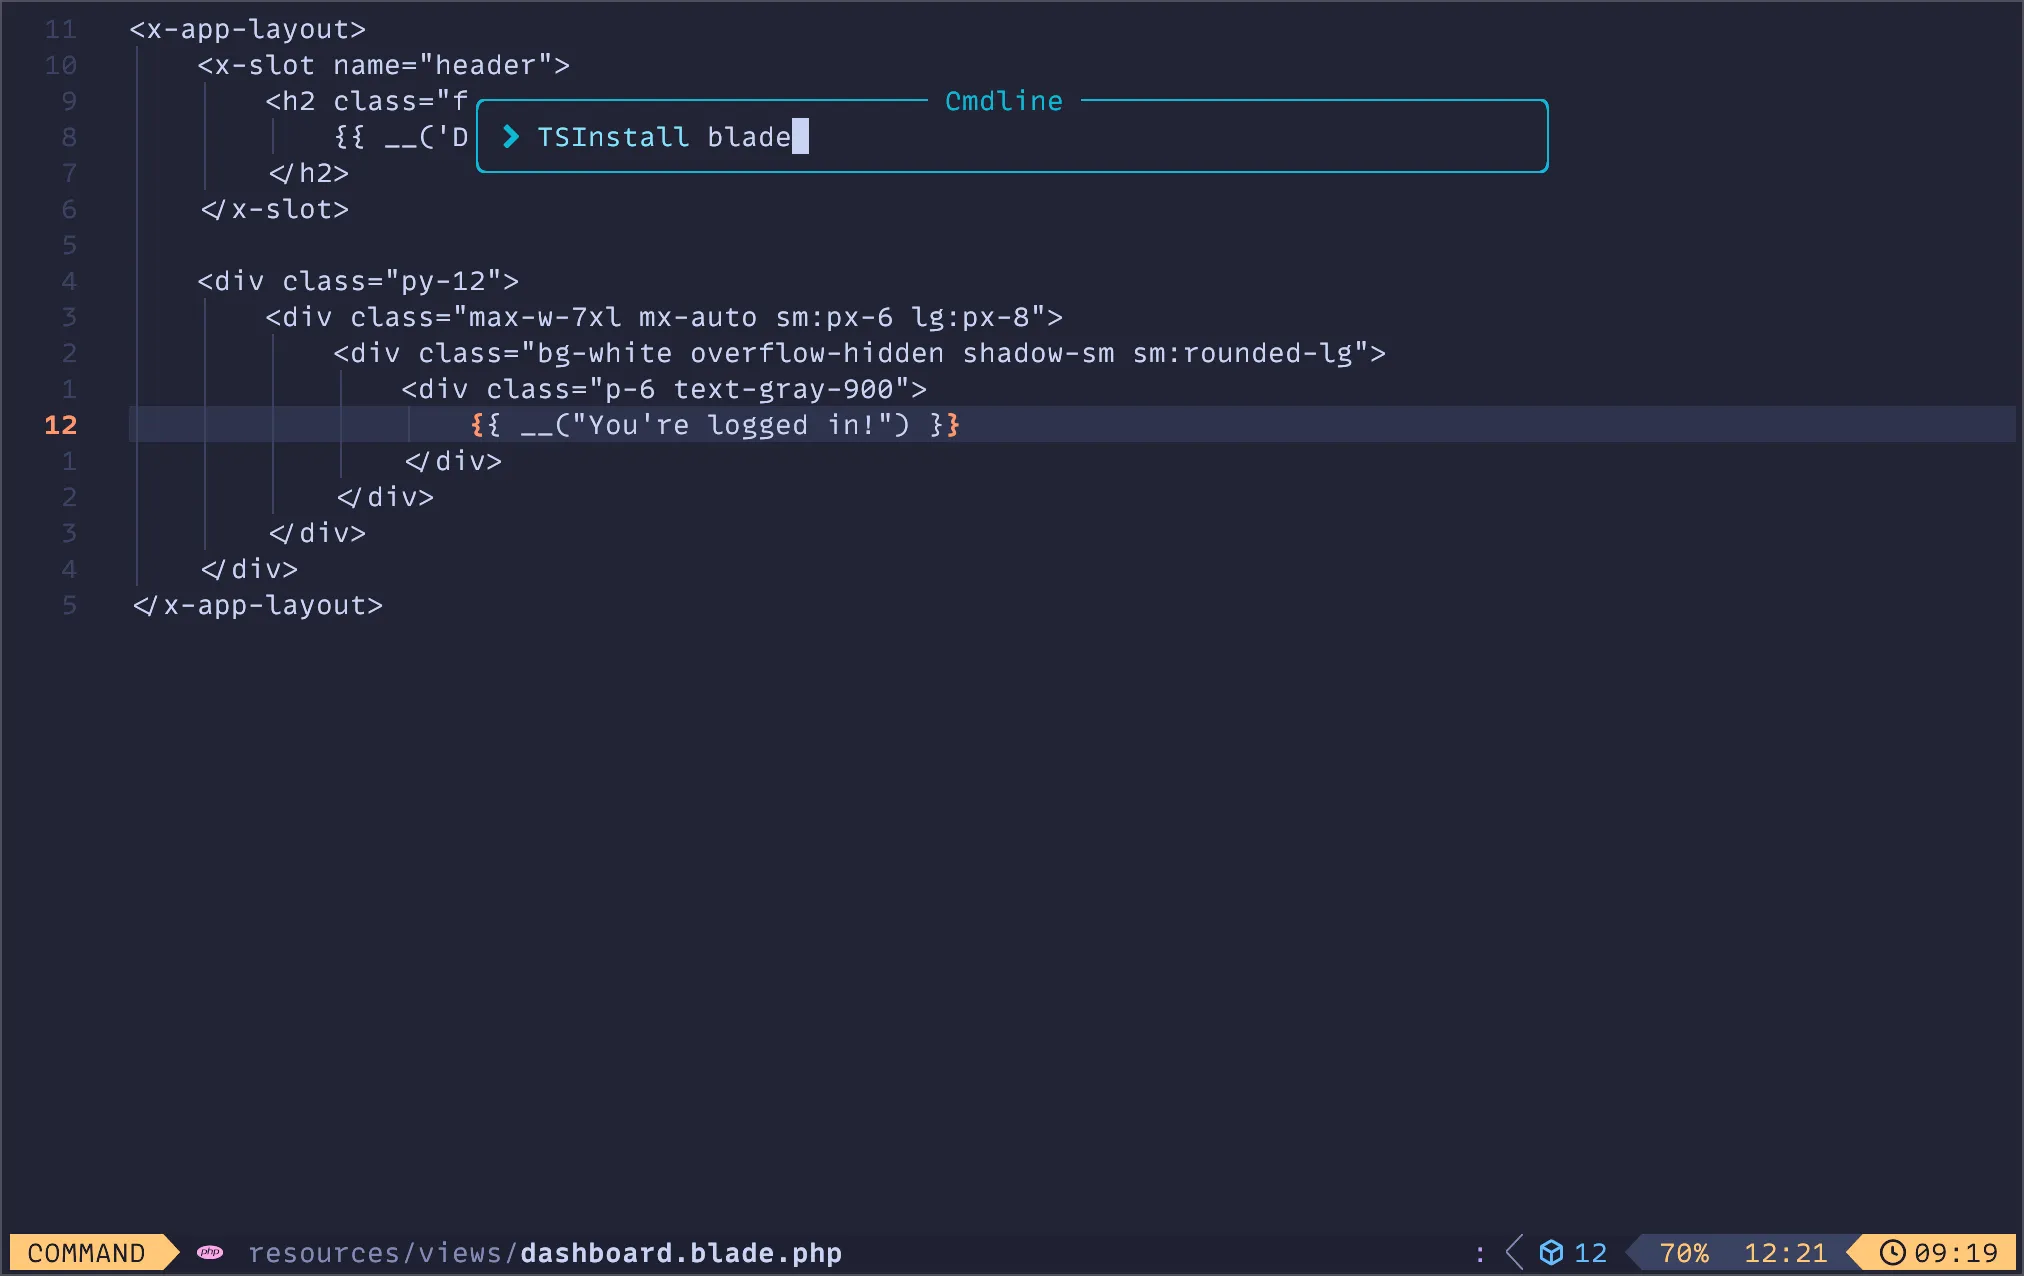
Next, we need to add some Treesitter queries for better code support. To achieve this, we have to create some new files from within Neovim.
Blade Injections
Type :TSEditQuery injections blade and add the following contents:
((text) @injection.content
    (#not-has-ancestor? @injection.content "envoy")
    (#set! injection.combined)
    (#set! injection.language php))

; tree-sitter-comment injection
; if available
((comment) @injection.content
 (#set! injection.language "comment"))

; could be bash or zsh
; or whatever tree-sitter grammar you have.
((text) @injection.content
    (#has-ancestor? @injection.content "envoy")
    (#set! injection.combined)
    (#set! injection.language bash))

((php_only) @injection.content
    (#set! injection.language php_only))

((parameter) @injection.content
    (#set! injection.include-children) ; You may need this, depending on your editor e.g Helix
    (#set! injection.language "php-only"))
Blade Highlights
Type :TSEditQuery highlights blade and add:
(directive) @tag
(directive_start) @tag
(directive_end) @tag
(comment) @comment
Blade Folds
Type :TSEditQuery folds blade and add:
((directive_start) @start
    (directive_end) @end.after
    (#set! role block))


((bracket_start) @start
    (bracket_end) @end
    (#set! role block))
HTML Injections
Finally, we’ll add some injection queries for Alpine support. Type :TSEditQuery and add:
;; extends

; AlpineJS attributes
(attribute
  (attribute_name) @_attr
    (#lua-match? @_attr "^x%-%l")
  (quoted_attribute_value
    (attribute_value) @injection.content)
  (#set! injection.language "javascript"))

; Blade escaped JS attributes
; <x-foo ::bar="baz" />
(element
  (_
    (tag_name) @_tag
      (#lua-match? @_tag "^x%-%l")
  (attribute
    (attribute_name) @_attr
      (#lua-match? @_attr "^::%l")
    (quoted_attribute_value
      (attribute_value) @injection.content)
    (#set! injection.language "javascript"))))

; Blade PHP attributes
; <x-foo :bar="$baz" />
(element
  (_
    (tag_name) @_tag
      (#lua-match? @_tag "^x%-%l")
    (attribute
      (attribute_name) @_attr
        (#lua-match? @_attr "^:%l")
      (quoted_attribute_value
        (attribute_value) @injection.content)
      (#set! injection.language "php_only"))))
Now, after adding everything, saving and restarting, you should now have syntax highlighting for Blade files!
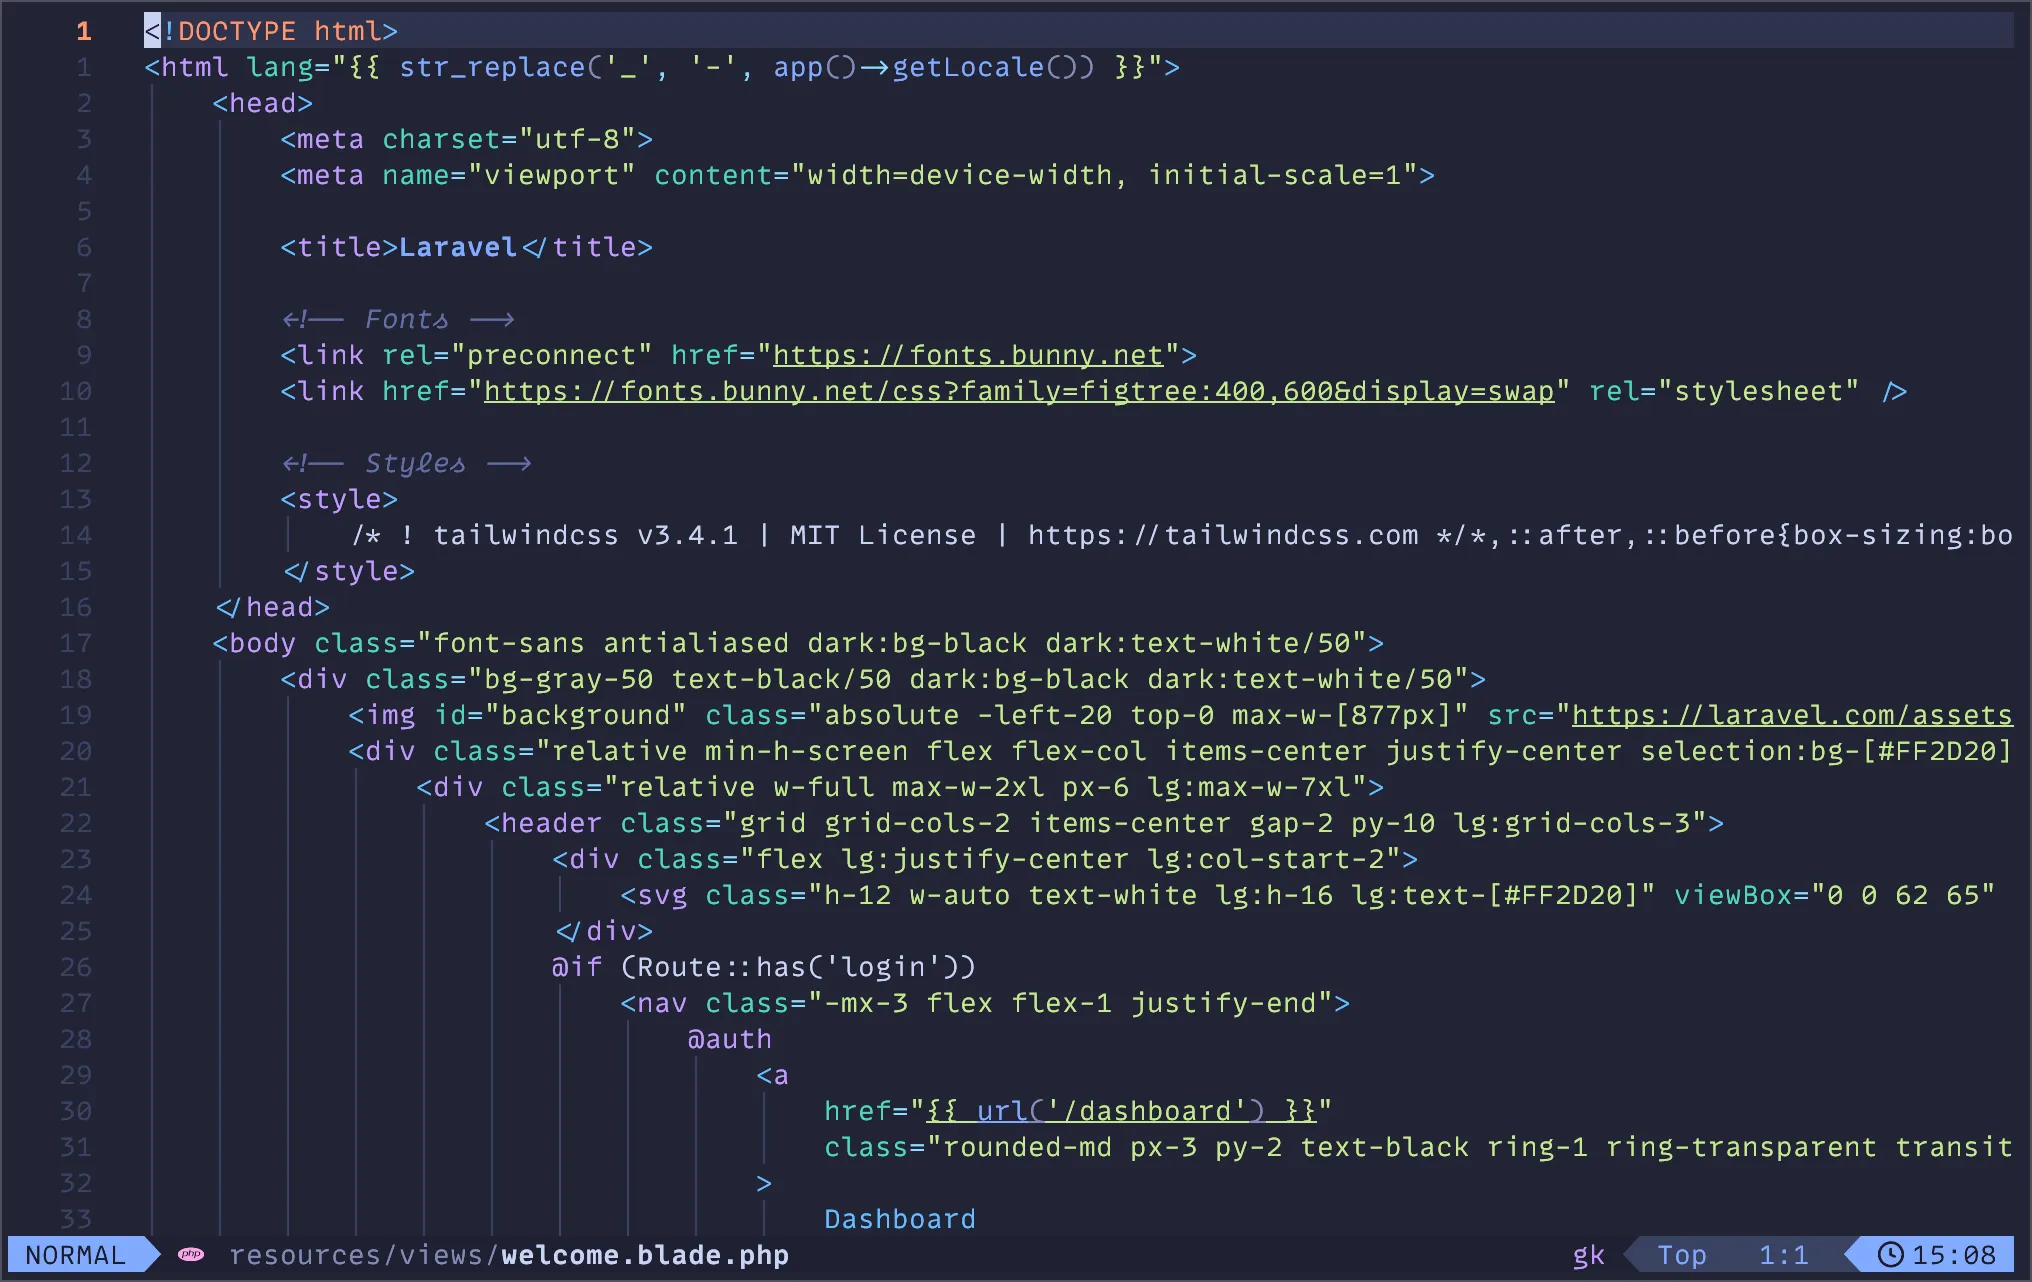
For more information and installation instructions, visit the repo for the Blade Treesitter parser.
Snippets
LazyVim comes with a plugin to easily create snippets. To create PHP snippets, you can create a new file: ~/.config/nvim/snippets/php.json similar to the example below:
{
  "strict types": {
    "prefix": "strict",
    "description": "Add strict types declaration",
    "body": [
      "declare(strict_types=1);"
    ]
  },
  "inv": {
    "prefix": "inv",
    "description": "Create PHP __invoke method",
    "body": [
      "public function __invoke(${1}): ${2:void}",
      "{",
      "    ${3}",
      "}",
      ""
    ]
  },
  "public method": {
    "prefix": "pubf",
    "description": "Create a public method",
    "body": [
      "public function ${1}(${2}): ${3:void}",
      "{",
      "    ${0}",
      "}",
      ""
    ]
  },
  "protected method": {
    "prefix": "prof",
    "description": "Create a protected method",
    "body": [
      "protected function ${1}(${2}): ${3:void}",
      "{",
      "    ${0}",
      "}",
      ""
    ]
  },
  "private method": {
    "prefix": "prif",
    "description": "Create a private method",
    "body": [
      "private function ${1}(${2}): ${3:void}",
      "{",
      "    ${0}",
      "}",
      ""
    ]
  },
  "public static method": {
    "prefix": "pubsf",
    "description": "Create a public static method",
    "body": [
      "public static function ${1}(${2}): ${3:void}",
      "{",
      "    ${0}",
      "}",
      ""
    ]
  },
  "pest test (it) method": {
    "prefix": "it",
    "description": "Create a pest test",
    "body": [
      "it('${1}', function () {",
      "    // Arrange",
      "    ${0}",
      "",
      "    // Act",
      "",
      "    // Assert",
      "",
      "});"
    ]
  }
}
You can add any other snippets you might want to this file, or create files for other languages to add snippets.
Additional Plugins
Laravel.nvim
This plugin can be used to quickly run Artisan commands with a great search feature using <leader>la. Or you can list all the routes in your application using <leader>lr.
return {
  {
    ...
  },
  {
    -- Add the Laravel.nvim plugin which gives the ability to run Artisan commands
    -- from Neovim.
    "adalessa/laravel.nvim",
    dependencies = {
      "nvim-telescope/telescope.nvim",
      "tpope/vim-dotenv",
      "MunifTanjim/nui.nvim",
      "nvimtools/none-ls.nvim",
    },
    cmd = { "Sail", "Artisan", "Composer", "Npm", "Yarn", "Laravel" },
    keys = {
      { "<leader>la", ":Laravel artisan<cr>" },
      { "<leader>lr", ":Laravel routes<cr>" },
      { "<leader>lm", ":Laravel related<cr>" },
    },
    event = { "VeryLazy" },
    config = true,
    opts = {
      lsp_server = "intelephense",
      features = { null_ls = { enable = false } },
    },
  },
}
Blade-Nav.nvim
Adds the ability to use Goto File on Blade views to jump to components and other views using gf.
return {
  {
    ...
  },
  {
    -- Add the blade-nav.nvim plugin which provides Goto File capabilities
    -- for Blade files.
    "ricardoramirezr/blade-nav.nvim",
    dependencies = {
      "hrsh7th/nvim-cmp",
    },
    ft = { "blade", "php" },
  },
}
Additional Tips
One giant benefit of LazyVim is the documentation. If there’s something you’re used to doing in VSCode and you want it in Neovim, there’s a chance LazyVim may already have that built-in. I recommend just going through each section in LazyVim to learn more about it.
Probably one of the most important sections is the keymaps. LazyVim uses which-key.nvim to help you remember the configured keycaps while you’re in the editor, but for a complete list, click here.
Do you want Git support? LazyVim has that covered with LazyGit which is a really nice terminal UI for Git. Use <leader>gg to open it. You can even install LazyGit directly using something like Homebrew to just run right on the command line using lazygit.
Need additional tooling like PHPStan or Psalm? Use <leader>cm or :Mason to bring up the Mason menu and search for what you need. It has may popular linters and formatters available to install.
Additional Resources
LazyVim Docs
Like I mentioned above, LazyVim provides amazing documentation and it’s definitely worth a read.
Neovim as a PHP and JavaScript IDE
Jess Archer has a fantastic course for setting up Neovim on Laracasts. If you are not subscribed to Laracasts, I cannot recommend it enough. I’ve been a lifetime user since 2017. If it’s something you’re interested in, please use my referral link.
Omakub
DHH (the creator of Ruby on Rails) created the Omakub package as a quick way to set up a development environment on Ubuntu Linux. Even if you’re not using Ubuntu, the repo for Omakub is worth checking out as it has a lot of nice configurations and tools, one of which being Neovim with LazyVim.
Kickstart.nvim
If you want something a bit more minimal than LazyVim, then Kickstart.nvim is a good start. You can watch this video by TJ DeVries about how to get started. Even if you want to keep using LazyVim, this is still a great resource to learn more about configuring Neovim.
Summary
I hope this helps get you started on your Neovim journey. It’s a powerful editor that is infinitely configurable. Though not as powerful as something like PhpStorm, it can get you pretty close for free and requires less CPU resources.
Even if you don’t plan to use Neovim as your primary editor, I think it can still be beneficial to learn the keybindings. I typically split my time between Neovim and PhpStorm and try to keep my keybindings as similar as possible. Luckily, the IdeaVim plugin for JetBrains IDEs makes this simple.
For your reference, I created a repo with all the files we created in this post.
Please let me know if you have any other questions about the setup or any additional features I might have missed.
Thanks for reading!